https://www.honeyflow.com/blogs/beekeeping-basics.atomFlow Hive US - Beekeeping Basics2025-07-22T19:36:08+10:00Flow Hive UShttps://www.honeyflow.com/blogs/beekeeping-basics/how-do-bees-make-beeswax2025-07-22T19:36:08+10:002025-10-16T05:35:43+11:00How do bees make beeswax?Flow HiveBeeswax is a wonder of nature. Humans have been using beeswax for thousands of years. It has been found in ancient cave art, has been used as currency, and was used to embalm the dead in ancient Egypt.
Today, it is still used to make candles, cosmetics, medicinal balms and more. And for the bees, it’s an essential part of their colony. Beeswax is the foundation and the structure of the beehive— their nursery and pantry. But how do these tiny insects create such a versatile material?
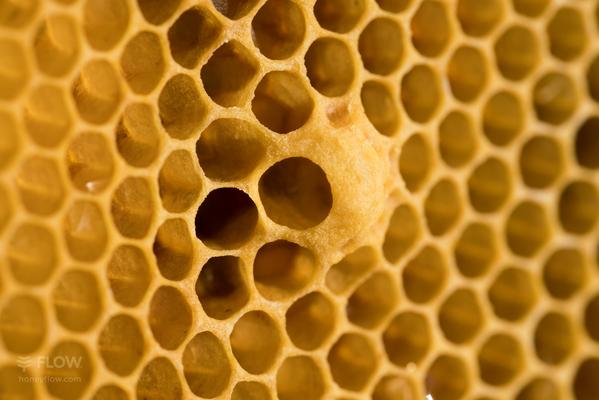
Beeswax is a natural wax produced by honeybees. Bees use wax to create the structure of the beehive - the comb in which they store food and raise the developing young bees.
Natural comb made of beeswax in a foundationless frame
How do bees make wax?
Young worker bees, 8-20 days old, are the primary producers of beeswax. They have special wax glands on their abdomens through which they secrete flakes of wax. Producing wax takes a lot of energy. Bees need to consume around 8 kg of honey to make 1 kg of beeswax. Therefore, bees will only produce wax when there is a lot of nectar available.
A honeybee producing wax scales from her wax glands
After the wax flakes have been secreted, the bees collect these wax flakes and chew them, adding enzymes from their saliva to make the wax more pliable before using it to construct comb in the hive. They cluster together, creating the perfect temperature for the wax to be pliable (33-36℃). This is also the optimal temperature for rearing brood.
Worker bees create chains by linking their legs and suspending themselves from hive frames or existing comb. This behavior, called “festooning,” is crucial for building and maintaining the comb. The chains act like scaffolding, allowing the bees to use their mandibles to mould wax into the structure of the honeycomb.
Festooning bees form a chain to construct comb
How do bees use wax?
The worker bees shape the wax into perfect hexagons or “cells”. Each hexagonal wax cell is used either as a nursery or a pantry. If the queen lays an egg in the cell, it will hatch into a larva after 3 days. The nurse bees will feed the developing larva for 6 days and then seal the cell over with more wax. The larva will develop into an adult bee over the following 12 days. She will then chew the wax capping open before emerging to take her place in the hive.
If the wax cells are being used for food storage, the bees will fill them with nectar, which they evaporate until it turns to honey. When the honey is ready to be stored, the bees will once again cover the cell with wax to safely store the honey. They can also fill cells with pollen, which they cap with wax and ferment into a food known as “bee bread”.
Can I collect beeswax from a Flow Hive?
In traditional beekeeping, most beeswax is collected by removing the wax capping from the honey cells before spinning the frames in an extractor. When using Flow Frames, the honey is harvested without removing the wax cappings. The bees can then reuse the wax capping after the honey has been harvested. Because wax takes a lot of time and energy for the bees to produce, reusing the wax cappings can increase the rate of honey production in a Flow Hive.
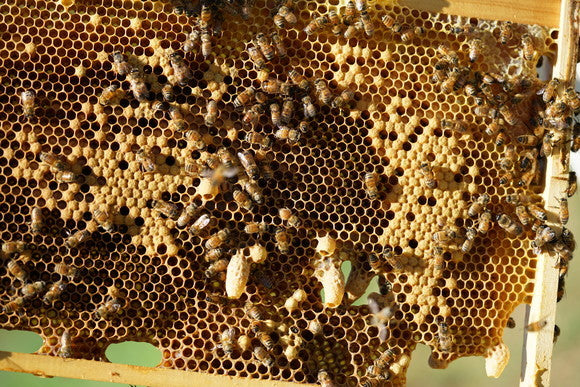
A Flow Hive Hybrid contains both Flow Frames and traditional timber frames
Because Flow Hive encourages the use of foundationless brood frames, you can collect honeycomb from the outer brood frames. It’s also possible to use a Flow Hive Hybrid with both traditional timber frames and Flow Frames in the Flow Super. Another option is to allow the bees to build comb in the roof space. The best way to do this is to place a perspex dish over the feeder hole in the inner cover.
Beeswax food wraps are a reusable alternative to cling wrap
Beeswax is a natural, sustainable and reusable product. Popular uses in the home include:
Food wraps
Salves, lotions, lip balm
Wood protection
Sealant
Polish
Soap
Along with honey, beeswax is a wonderful bonus of having a beehive in your backyard. If you’re curious about keeping bees, Flow Hive has everything you need to get started. Our revolutionary harvesting technology makes beekeeping more accessible than ever. And with unrivalled customer support and education, we’re committed to creating a community of educated, empowered beekeepers, protecting pollinators, and highlighting the importance of bees to the world.
]]>
https://www.honeyflow.com/blogs/beekeeping-basics/ants2024-07-23T20:27:30+10:002025-10-16T05:43:21+11:00How to keep ants out of your hiveFlow HiveAnts can be a nuisance in beehives. Most ants won’t harm honey bees, they are more of an inconvenience. We’ve got some tips on keeping your hive free from ants.
Ants are attracted to beehives as a source of food, warmth, and shelter. They may even start a nest and lay eggs in the hive. Primarily, they are attracted by the smell of honey from the hive.
The Flow Hive 2+ with Flow Ant GuardTM protecting the hive from ant invaders.
When ants are a problem in beehives
A healthy honeybee colony can usually defend itself easily from ant intruders. The bees can remove most of the ants from the hive and are not badly affected. Ants may remain in parts of the hive that the bees can’t access.
A weak colony, or a smaller colony, such as a newly captured swarm may not have sufficient bee numbers to defend itself against ants. An ant invasion could worsen existing problems in a failing colony and speed up its demise.
Some species of ants can be very harmful to honeybee colonies. Argentine ants can overwhelm a colony, taking food stores and brood from the hive, often causing colonies to abscond. Beekeepers in areas with these ants present need to be extra vigilant.
How to remove ants from a beehive
Removing ants from the hive will usually be a quick and simple job. If you find ants in your hive, simply remove them with a bee brush, or use your hive tool or some foliage. Check under the roof and inner cover, and in crevasses that the bees can’t easily access.
How to deter ants from a beehive
Once you have removed the ants from the hive, the important thing is to stop them from easily accessing the hive again. Ants can be persistent, so you may need to repeat these actions a few times.
Keep your hive clean – clean up any honey that gets spilt when harvesting. If you have a Flow Hive, remove the honey trough cap and, if necessary, clean the leak-back gap with a thin tool such as a kitchen skewer or wire to allow the honey to drain back into the hive.
Cinnamon powder is said to deter ants, you can sprinkle it in the corners of your brood box and super, and behind the windows if you have a Flow Hive.
Keep your hive on a stand – the hive should be elevated. Use the adjustable hive stand if you have a Flow Hive 2 or 2+.
Create a barrier to prevent the ants from easily accessing the hive. If you have a Flow Hive 2+, use the Flow Ant GuardTM. Fill the caps with Vaseline or vegetable oil and adjust the cover, depending on the size of the ants you’re dealing with. You can also purchase Flow Ant GuardTM separately for the Flow Hive 2.
Adjustable hive stand legs featuring Flow Ant GuardTM.
If you don’t have Flow Ant GuardTM, place the legs of your hive stand in small containers, such as the end of plastic bottles. Add a barrier substance, such as diatomaceous earth, vegetable oil, cinnamon powder of grease to the containers. Check them for refills when necessary.
Remove any foliage touching the hive, as the ants will simply use this as a bridge to bypass your barrier.
For more information on how to deal with beekeeping pests, check out TheBeekeeper.org. This online course features the world’s beekeeping experts and covers everything you need to know to take excellent care of your bees.
]]>
https://www.honeyflow.com/blogs/beekeeping-basics/beekeeping-for-beginners2024-07-09T20:11:33+10:002025-10-16T05:31:15+11:00Beekeeping for beginnersFlow HiveIf you’re thinking about becoming a beekeeper, there are some factors you’ll want to consider. Beekeeping is a wonderful hobby that allows you to connect with nature in a unique way. Getting to know the workings of a honey bee colony is endlessly fascinating. Plus, tasting the honey produced by your own bees is a special experience.
Flow Hives have made harvesting easier than ever, inspiring thousands to take up beekeeping. Good preparation is key to having a successful and enjoyable start to your beekeeping adventure.
To begin your beekeeping journey, you’ll need a few essential ingredients: some basic beekeeping knowledge, a beehive, protective equipment, bees, a hive tool, and a smoker. With a starter bundle from Flow Hive, you can get everything you need (except the bees) at a special discount price.
A Flow Hive is a special type of beehive that contains Flow Frames, which allow you to harvest honey directly from the hive. This revolutionary invention takes the hassle out of harvesting honey and has inspired thousands of new beekeepers around the globe.
How many beehives should a beginner start with?
Many beekeepers get started with a single beehive, but there are several advantages to starting with at least two hives:
Faster learning
Better chance of honey harvests
Extra resources and options
Swarm control
It’s a good idea to start with a small number of hives, as beginning with too many could be overwhelming. You might want to stick with one or two hives, or gradually build up as your knowledge and passion for beekeeping grows. Bee colonies naturally reproduce through swarming, which provides an opportunity to either start a new hive or share the colony with another beekeeper.
How much does it cost to start keeping bees?
The price of getting started as a beekeeper can vary and depends on location, the type of hive you buy, where you get your bees from, and whether you purchase equipment such as a honey extractor. Because the Flow Hive allows you to harvest honey directly from the hive, there’s no need to purchase additional extracting equipment.
Flow Hives are available in a range of models to suit different budgets, from the premium Flow Hive 2+ to the economic Flow Hive Hybrid. It’s also possible to buy the Flow Frames separately and add them to an existing beehive.
How many bees do you need to start beekeeping?
A fully developed honey bee colony contains about 20,000 - 60,000 bees. The most common ways to start a new colony are through a nucleus colony (known as a “nuc”), a package of bees, or splitting a hive. All of these contain around 10,000 bees on average.
The queen is the most important bee in the colony. A mated queen is required for the colony to grow and survive, and she can lay up to 2,000 eggs per day. Most of these will develop into female worker bees, and the rest will be males, known as drones.
How to get started beekeeping
Check your local regulations – See if there are any restrictions on keeping bees in your area. It’s a good idea to connect with other beekeepers in your area to find out about this.
Get a starter bundle from Flow Hive – This beginner beekeeper kit contains the equipment you need to harvest honey directly from the hive. Safety gear and a sweet saving are included.
Learn as much as you can – Flow Hive provides beekeepers with a swarm of resources, including a weekly Q&A livestream, beginner beekeeping blogs and an extensive FAQ. Our online beekeeping course is a great way to fast-track your learning.
Beekeepers choose varieties of honey bees based on characteristics like productivity, temperament, disease resistance and climate suitability. The queen bee’s genetics will determine the characteristics of the entire colony. Certain breeds, such as Italian and Carniolan, are known for their gentle temperament and are therefore often recommended for beginners.
Depending on where you get your bees from, you may not have the option to choose a particular breed of bee. Many honey bees will be a mixture of different breeds. The most important thing is that you get bees that are healthy, not aggressive and adapted to your local conditions.
What equipment do I need to start beekeeping?
Protective Clothing
You need to wear protective clothing when working with bees. Bee suits are usually white, as bees react badly to darker colors. Your bee suit should fit comfortably over your clothes, and allow for a good range of motion.
Beekeeping suit with pockets, elastic cuffs and wristbands. There should be no spaces where bees can enter under the fabric.
A beekeeping hat or hood with a veil should provide a clear range of vision, and the mesh should not sit against your skin.
Beekeeping gloves should be strong and pliable to allow for dexterity when handling equipment.
All Flow bee suits include these essential features.
Boots that cover your ankle, use the stirrups and thumb loops if your suit has them.
Hive tool – also known as a J-tool, is used to clean, scrape, lever and lift the various parts of your hive.
Smoker – a tool that helps to keep bees calm during inspections. It is used to blow cool smoke that masks the bees’ alarm pheromone.
Other accessories – a hive tool and smoker are essential, while other useful accessories include: bee brush, entrance reducer, hive stand, logbook and a honey extractor (unless you have a Flow Hive, where no extractor is necessary).
Flow Super Lifter – the Super Lifter is a beekeeping tool that helps to open a beehive with minimal effort. It makes beekeeping more accessible by reducing the amount of force needed to lift beehive boxes, holds the boxes while you tend to your bees, and allows you to replace the boxes gently.
Beehive components
Most beehives are based on the Langstroth design and consist of the following components:
Base – where the hive entrance is situated.
Brood box – usually the bottom box of a hive, where the queen lives and lays eggs. Contains 8 or 10 removable brood frames, on which the bees build comb to raise new bees and store honey and pollen.
Queen excluder – a grille between the brood box and honey super that allows worker bees to pass through, but prevents the queen from entering the honey super.
Honey super – where bees store nectar and then turn it into honey. Contains the Flow Frames in a Flow Hive, and regular wooden frames in a traditional hive.
Inner cover and roof.
What do you need to keep bees?
Aside from safety equipment, a beehive and bees, there are a few extra requirements to keeping bees.
Somewhere to put your hive - This may be a backyard, rooftop, balcony or a rural location. Flow Hives require very little space; the bees need a clear space at the front of the hive to enter and exit. You will need enough room to access the back of the hive for harvesting and hive inspections.
Time - Although honey bees generally look after themselves, beekeeping does require some time investment. You’ll need to inspect your bees to make sure they’re healthy.
Licence - In most areas, you don’t need a licence to keep bees, but it’s always best to check your local regulations first. Registering your beehives is often a requirement.
Knowledge and passion - Caring for bees is an inspiring pastime and an incredible learning journey. It’s a great way to connect with nature and experience how the changing seasons affect your bees’ behaviour. Harvesting honey from your backyard enables you to experience the wonderful range of flavours created from the plants in your neighbourhood.
Best time to start beekeeping
In most temperate regions, spring is the best time to get started beekeeping. This is when honey bees tend to expand their numbers to take advantage of the blooming season. Colonies start to swarm and beekeepers split their hives - making colonies available for new beekeepers. Depending on your location and weather, the right conditions might not occur until early summer. In other regions like the tropics, bees are active all year round and you can start a new colony at any time.
Winter is a good time to prepare for beekeeping. Do research, purchase equipment and connect with other beekeepers. There is often a waiting list for new colonies, so it helps to put an order in early if you’re planning to get bees in the spring.
Best beekeeping course for beginners
For a step-by-step guide to beekeeping - check out TheBeekeeper.org. This online beekeeping course covers everything you need to know and features world experts in beekeeping. Learn in your own time with high-quality videos so you can feel confident looking after your bees.
Not sure if keeping bees is right for you? Got more questions?
]]>
https://www.honeyflow.com/blogs/beekeeping-basics/difference-flow-langstroth2024-04-17T22:28:19+10:002025-10-16T05:38:11+11:00Difference between a Flow Hive and a Langstroth.Flow HiveThe Flow Hive is based on the Langstroth-style beehive. The chief difference between Flow Hives and conventional Langstroth hives is that the honey can be harvested without opening the hive. This is due to the revolutionary design of the Flow Frames. Flow Hives also come packed with extra features and support to enhance the beekeeping experience.
A Flow Hive and a Langstroth beehive consist of the same basic components:
Base - where the hive entrance is situated.
Brood box - the bottom box of the hive, containing removable frames where the bees build comb. The queen bee lays eggs in the brood box, and the bees also store some honey and pollen here.
Honey super - this box sits on top of the brood box and contains frames used for honey storage only. In a conventional hive, these will be wooden or plastic frames with plastic or wax and wire foundation. In a Flow Hive, the super contains the Flow Frames - which do not have to be removed from the hive during harvesting.
Roof - usually a flat roof on conventional beehives. The Flow Hive comes with a sloping gabled roof.
Honey harvesting - Flow vs Langstroth
Harvesting honey from a Langstroth hive is a time and labour-intensive process involving several steps:
Open the hive to remove the frames and check if they are ready to harvest.
Remove the frames from the beehive(s), and shake or brush all the bees from the frames and place them in a covered box that the bees cannot access.
Transport the frames to the honey processing area.
Remove the wax cappings from each frame using a heated knife.
Place the frames into a honey extractor which spins them until the honey drains out.
Filter the honey before bottling it.
Clean all the equipment and return the empty frames to the hive(s).
Harvesting from a Flow Hive is as simple as turning a key and watching the honey flow into your jar. The built-in observation windows allow you to check if the honey is ready without opening the hive.
Honey flavors
Bees forage on a wide variety of flowering plants and tend to fill cells in succession one frame at a time. This results in honeycomb frames that can look, smell and taste unique. Because conventional honey harvesting is a significant task, beekeepers tend to wait until their hives are all or mostly full with capped honey before harvesting from them. The honey from different hives and different frames gets blended together.
The Flow Hive’s unique harvesting system enables beekeepers to easily harvest small batches, one frame at a time, with no further processing required. This preserves the unique honey flavors produced during different seasonal blooms. A University of Queensland study found the Flow Frame extraction method yields honey with fresher, cleaner flavors than conventionally extracted honey.
Flow Hive features
As well as the Flow Frames which allow for easy honey harvesting, Flow Hives have a range of features not found in regular Langstroth hives.
Beautiful design & quality woodware - Flow Hives are impeccably crafted from Araucaria pine or western red cedar timber. They are fun to assemble and look great in a garden, rooftop or patio.
The unique observation windows provide a fascinating insight into the bees as they work inside the hive. Great for checking the honey stores and as an educational tool.
Pest & ventilation control - Flow Hives come with inbuilt ventilation control at the base of each hive. The screened baseboard and multifunctional tray can be used to monitor and trap pests.
Optional hive stand - The premium adjustable hive stand helps to keep the hive stable, level and off the ground. Ant guards can be added for extra pest control.
Flow Super Lifter - Another beekeeping innovation from Flow, this tool attaches to the beehive and uses leverage to make lifting beehive boxes much easier. takes the strain out of beekeeping and gentler on the bees. Also compatible with Langstroth hives, the Super Lifter is available exclusively from Flow.
Unrivalled support - Thousands of new beekeepers have been inspired by the Flow Hive to take up this wonderful hobby. Flow offers a wide array of education and support to beekeepers, including live streams, video tutorials, blogs and extensive FAQs. For the best in beekeeping education, TheBeekeeper.org is our highly-rated online course, featuring world experts in beekeeping.
Got more questions about beekeeping or the Flow Hive? Contact our friendly support team today.
Beekeepers using Langstroth hives often use multiple honey boxes on a hive during a strong nectar flow. The hives may be stacked above head height, and the beekeeper needs to lift these heavy boxes when harvesting honey or inspecting the hives. These extra boxes also need to be stored somewhere safely and away from pests when not in use. Along with extracting equipment, this can mount up to a significant amount of storage space required for Langstroth hives.
Langstroth hives with multiple boxes
With a Flow Hive, there’s no need for extra boxes, as the honey can easily be harvested as the bees produce it. As the extracting equipment is contained within the hive, you can save on storage space.
Get started beekeeping
If you want to start harvesting your own honey, Flow Hive has you covered. We stock a range of beehives and equipment. We also offer lots of support and helpful resources for beginner beekeepers.
Featuring a beautiful beehive, safety gear and Flow’s patented honey harvesting technology - grab a sweet saving with a starter bundle from Flow Hive.
]]>
https://www.honeyflow.com/blogs/beekeeping-basics/how-do-bees-make-honey2024-02-13T04:26:20+11:002025-10-16T05:44:33+11:00How do bees make honey?Flow HiveHoney is a wonderful, sweet substance created by busy honeybees. Whether living in a wild colony or a beekeeper's hive. How do these little winged alchemists produce their liquid gold?
Honey is bees’ way of preserving their food so they have something to eat when there aren’t many flowers in bloom. Honey can be stored in the hive and consumed when needed. If bees stored nectar without turning it into honey first, it would ferment.
Want to know more about the honeybee diet? Check out our blog - What do bees eat?
What is honey made of?
Bees eat two types of food, both of which come from flowers. Pollen is their protein source, and nectar is their carbohydrate. Nectar is a sugary liquid produced by plants, with sucrose being the main sugar. Enzymes in the bees' honey stomachs break this down into the simpler sugars glucose and fructose. Honey also contains vitamins, minerals, amino acids, enzymes, and compounds from the flowers. The unique flavors, fragrances and colors of different kinds of honey depend on the type of plants the nectar comes from.
How honey is made
Ever wanted to harvest your own delicious honey, straight from a beehive in your backyard? With Flow Hive’s starter beehive kit, you get to experience the wonderful range of flavors created from the plants in your neighborhood.
Honey is bee food - when there’s plenty of nectar to be had, a colony will produce enough to store. During periods when there are not a lot of flowers in bloom or the bees can’t get out to forage due to bad weather, they’ll use up the stored honey. Coming up to winter, bees need to have plenty of honey stored to feed on and keep warm through the winter months. Bees will gorge on honey before swarming. This gives them the energy needed to build a new nest.
So next time you’re enjoying some tasty honey, save a thought for these industrious insects and the incredible teamwork it takes to make honey.
Want to learn more and help save bees?
Check out our online course at TheBeekeeper.org. The course is full of fascinating videos about bees and is available with a 30-day free trial. And what’s more, the profits go towards protecting all pollinators, including honeybees.
If you want to start harvesting your own honey, thenFlow Hive has you covered. Our revolutionary harvesting system allows you to collect honey from the hive without disturbing the bees. We stock a range of beehives, equipment and have special bundle offers that include everything you need to get started. We also offer lots of support and helpful resources for beginner beekeepers.
]]>
https://www.honeyflow.com/blogs/beekeeping-basics/what-do-bees-eat2024-02-13T04:26:10+11:002025-10-16T05:45:35+11:00What do bees eat?Flow HiveHoneybees don’t just eat honey. Like us, bees need a balanced diet, with carbohydrates, proteins, vitamins, minerals, and amino acids. Honeybee food comes from flowers - carbohydrates from nectar and protein from pollen. What bees eat varies depending on their development stage, role in the colony, and food availability.
Here we’ll take a closer look at the honeybee diet. We look into when beekeepers should feed their bees.
Nectar is the main food of adult honeybees. Nectar is a sugary liquid produced by plants in special glands called nectaries. The plants produce nectar to attract bees and other pollinators. When the bees visit different flowers, they transfer pollen grains, enabling the plants to reproduce. It’s an amazing act of partnership between plants and bees!
Learn more about pollination in this amazing video from our online education platform - TheBeekeeper.org.
Honeybees collect nectar from flowers and store it in a special organ called the “honey stomach” while they carry it back to the beehive. The bees store nectar in cells, then reduce the water content until it becomes syrupy - and that’s honey!
Honey is preserved nectar, and this is what the bees feed on when there aren’t many flowers in bloom - like during long winters or droughts. For an in-depth look at the process, see our blog - How do bees make honey?
The great thing for us is that often bees make more honey than they need for themselves. That’s when beekeepers can collect some of that sweet honey to enjoy. And there’s no easier way to collect honey than with a beehive starter kit from Flow Hive.
Pollen & bee bread
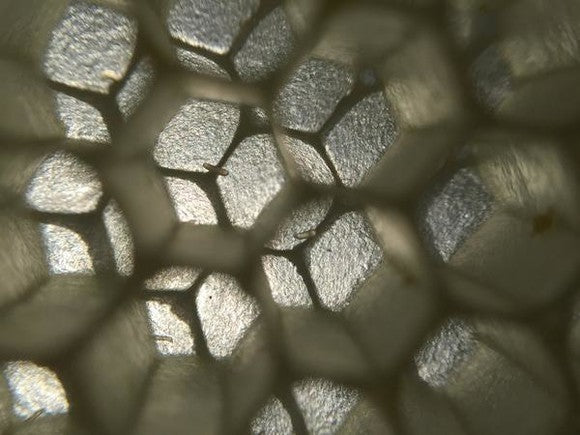
As we mentioned above, pollen is how most plants reproduce. Tiny pollen grains transfer genetic material between plants - and honeybees are the most efficient pollinators on the planet. Honeybees also eat pollen - it’s their main protein source. They collect it in special “pollen baskets” on their legs.
These incredible structures are magnified pollen grains. (Image from The magic of pollination - TheBeekeeper.org.)
Did you know that bees make their own bread? - To do this, they pack the pollen into honeycomb cells and mix it with nectar, then they seal the cells with honey. They leave this mixture to ferment - like a good sourdough. Foraging bees can’t digest pollen directly, so this process makes the protein in pollen available to them. It’s called bee bread and is a very important food for the developing larvae.
Royal Jelly
You may have heard of royal jelly before, but maybe didn’t know what it is. This special substance is a queen-maker! Royal jelly is a white substance containing sugar, protein, and other micronutrients. Nurse bees secrete royal jelly from special glands, and then feed it to the developing larvae. Most larvae only get royal jelly for the first three days after they hatch - after that they are sustained with bee bread and honey.
But if the larva has hatched into a special cell called a queen cup, the nurse bees will exclusively feed this larva royal jelly throughout her development - and this is what triggers her to become a queen bee.
Other bees
But honeybees aren’t the only type of bee around. In fact, there are about 20,000 species of bee in the world - and most of them don’t make honey or live in big colonies. Lots do eat pollen and nectar, but some species have a more varied diet. This can include floral oils, fungi, meat, other bees’ eggs, and even sweat and tears.
A few examples of beautiful bees that aren’t honeybees.
Feeding your bees
If you’ve got a beehive of your own, there are times you may need to give them extra food to make sure they stay healthy and strong when there aren’t many flowers about. Simple sugar water is the most common bee food, while pollen patties, dry sugar, and specially prepared syrups are also options.
We’ve got more info on what, when, and how to feed your bees on our support portal and YouTube channel. And if you’re looking for detailed lessons on bee nutrition, how to make feeders, and lots more, sign up for our online beekeeping course - TheBeekeeper.org.
Becoming a beekeeper
Now that you know what bees eat, maybe you’re thinking about getting some of your own. There’s really nothing like tasting delicious honey from your backyard! A beehive starter kit from Flow Hive offers the best in honey harvesting - saving the need for messy work and extra equipment. Plus, we’ve got a wealth of resources to support new beekeepers in their new endeavor.
]]>
https://www.honeyflow.com/blogs/beekeeping-basics/advantages-disadvantages2024-02-13T04:26:06+11:002025-10-16T05:41:19+11:00What are the advantages of the Flow Hive?Flow HiveEver since the launch of the Flow Hive in 2015, it has drawn mixed reactions from the beekeeping community. While it sparked a wave of enthusiasm for and interest in beekeeping, the Flow system has had its detractors. While some of the skepticism directed at it is rooted in valid concerns, much of it arises from misconceptions and misinformation.
Many of the initial criticisms have been debunked, and with over 100,000 Flow customers around the globe, the Flow Hive has been a resounding success and a revolutionary breakthrough in the world of beekeeping. Although the Flow Hive makes honey harvesting easier, this doesn’t mean that every beekeeper needs to use a Flow Hive to successfully care for their colony. Each approach to beekeeping has its unique advantages and drawbacks, and there is no universally correct way to care for bees. Beekeeping, like any craft, embraces diversity, and this diversity is its strength.
Here we’ll take a look at some of the criticisms of Flow Hives and dispel certain misconceptions. We’ll also briefly mention the advantages of Flow Hives and take a look at why they are beloved by so many beekeepers.
Conventional beekeeping methods involve the arduous process of dismantling the hive, removing frames, and extracting honey using specialized equipment. The Flow Hive eliminates this messy, sticky, labour-intensive work. There’s something thrilling every time you turn your Flow Key and watch as gorgeous honey drains straight from the hive into your jar, leaving the bees undisturbed. The Flow system makes honey harvesting easier and less stressful for both the beekeeper and the bees.
Innovative design
Innovation has always been at the forefront of Flow – not surprising for a company founded by an inventor who loves beekeeping! Each iteration of the Flow Hive builds on the original concept to improve and refine products based on user feedback. The built-in observation windows, pest management tray and adjustable hive stand are just a few examples of the features that set the Flow Hive apart.
The hive's built-in observation windows allow you to monitor the bees' progress without disturbing them, making it an excellent educational tool for beginners and a fascinating learning experience for kids.
Easier on the beekeeper
The Flow Super Lifter is another innovation for ease, saving time, promoting the bees’ well-being, and making beekeeping more accessible. Carefully designed to let you open a beehive with minimal effort, the Super Lifter makes hive inspections quicker and easier than ever before.
Beekeepers are calling it a game-changer, and it’s enabling many to extend their beekeeping journey as lifting heavy hive boxes becomes more challenging.
Unique flavors
One of the remarkable aspects that constantly astounds customers is the distinctive nature of each Flow Hive harvest. This uniqueness arises from this groundbreaking system that enables you to harvest honey frame by frame. This approach allows you to savour the individual flavors and subtle aromas specific to your local area. Bees forage on a wide variety of flowering plants and tend to fill cells in succession one frame at a time. This results in honeycomb frames that can look, smell and taste unique.
With Flow's patented technology, you can harvest in small, separate batches, directly into your jar. This means there's no need for the blending typical of conventional harvesting methods. As a result, you can savor the pure essence of your local environment in every jar of honey, preserving the unique qualities that set your honey apart from all others.
Varied honey colours from a single Flow Hive
Ethical impact
Flow is about more than harvesting honey in a gentle way – we’re about creating community, educating on the importance of bees, and empowering beekeepers. Bees are tiny environmental champions and we strive to follow in their footsteps by doing business in a regenerative, ethical and sustainable way.
We’re striving for a world in which pollinators are protected and celebrated for the key role they play in sustaining life on our planet. For this reason, we’re a certified B-corp, meaning we have to meet the highest verified standards of social and environmental performance, transparency, and legal accountability.
We’re committed to the future of people and pollinators, and that’s why we’ve already donated over $1M AUD to projects that support and conserve pollinators. Because if we look after the bees, they’ll look after us. And the honey really is an amazing bonus!
Community and support
The Flow Hive has sparked a vibrant global community of beekeepers who share their experiences, knowledge, and tips. Coupled with unrivalled educational resources and excellent customer support, this sense of community makes Flow a great choice for first-time beekeepers.
What are the disadvantages of the Flow Hive?
Cost
It's undeniable that the Flow Hive comes with a higher price tag compared to conventional beehives. However, this upfront investment can be balanced against the expenses associated with conventional honey extraction methods. In the conventional process, labor-intensive harvesting and the need for costly extraction equipment can add up significantly over time. In the long run, when you factor in the time, effort, and investment required for extraction equipment in a Langstroth hive, the pricing becomes quickly more comparable.
Flow technology is the first of its kind in the world. With an aim to do business in an ethical and sustainable manner with all those involved in the creation of Flow products, this is a further contributing factor to the price point.
All plastics used are of the highest quality available, and all timber is sustainably sourced, harvested, and milled, which means it is more expensive than using lower-grade, less environmentally conscious timber sources. All staff are paid fair wages and employed in fair-trade conditions.
With an aim to make these premium products as accessible as possible, there are a range of options to suit different budgets.
Plastic in beehives
Some beekeepers hold strong reservations about using plastic components anywhere within beehives. Plastics have been used for many years in beehives for both brood and honeycombs and have not been found to negatively impact on bee colonies.
Foundationless brood frames are provided with all Flow Hives. This allows the bees to build their own natural brood comb structure with different cell sizes for the different types of bees.
Bees building natural comb in a foundationless brood frame
Flow Frames are manufactured from the highest quality food-grade materials. All plastics are BPA-free, and are not manufactured with any bisphenol compounds. Third-party labs have tested this material and have found it to be free of estrogenic and androgenic activity. The bees coat the Flow Frame cells in wax before they store their honey, so the honey does not come into contact with the plastic in the Flow Frames.
Flow Hives are bad for bees
Critics have raised concerns that the Flow system might tempt beekeepers to harvest honey too frequently, leaving the bees short of their own food supply. Some also contend that the ease of honey extraction will lead to lazy beekeeping, discouraging beekeepers from regularly inspecting their hives and maintaining their colonies.
It's important to understand that while the Flow Hive simplifies the honey-harvesting process, it doesn't absolve beekeepers of their responsibility to care for their bees properly. This involves ensuring that the bees have an adequate food supply, especially during periods of scarcity, conducting regular checks for diseases and pests, and adhering to best practices in beekeeping. Beekeeping is a commitment and a continuous learning experience, demanding time and effort but offering significant rewards in return.
Education and support for beekeepers have always been at the forefront of our mission. We provide a wealth of resources through our FAQs, blogs and educational videos. Cedar’s weekly Facebook Live sessions cover a range of beekeeping topics and allow you to ask questions in real time. Our community forum is a great place to swap tips and get advice from beekeepers around the world.
To provide comprehensive education, our online course at TheBeekeeper.org covers everything aspiring beekeepers need to know. With insights from leading beekeeping experts, the course starts with the basics and progressively delves into more advanced topics, equipping members with the knowledge and skills to become confident beekeepers.
You can’t harvest wax or honeycomb from a Flow Hive
Flow Frames are designed purely for the ease of harvesting honey, and as such, you cannot produce beeswax/honeycomb from these. Honey comes out of the Flow Frames free from wax and ready for use. All the wax stays in the hive and the bees reuse it. Bees use about 7kg of honey to make 1kg of wax, so this aspect of the Flow system can improve your hive’s rate of honey production.
If you are interested in collecting beeswax from your hive, the Flow Hive Hybrid is designed for those interested in collecting beeswax and enjoying the natural honeycomb experience, offering the best of both worlds. This complete hive combines Flow Frame technology with conventional timber frames in the Flow Super, enabling beekeepers to harvest both honey and honeycomb. This means you can collect beeswax from the four conventional frames within your super.
Additionally, there are a couple of options available for those using a Flow Hive 2 or a Classic model who wish to harvest honeycomb. One approach involves removing the plug from the inner cover, allowing the bees to access the roof area where they can build comb. Putting a container such as a Pyrex dish above the hole for the bees to build comb in is more convenient and less messy than harvesting from the roof cavity. Another option is to add an extra box of foundationless frames above the Flow Super, allowing you to cut the honeycomb directly from these frames.
Honey will crystallize in the Flow Frames
Flow Frames offer numerous advantages for dealing with honey that is prone to crystallization:
Temperature — Honey often crystallizes in the super when it is removed from the hive and the temperature drops. Because the Flow Frames are harvested while still on the hive, they retain the heat from the brood box and this can reduce the likelihood of the honey crystallizing in the Flow super.
Quick harvesting — There is a window of time between when honey is capped and ready for harvest when it crystallizes. The Flow Hive facilitates quick and easy harvesting, allowing beekeepers to take advantage of this short timeframe to collect liquid honey.
Sampling honey — Beekeepers can easily sample the honey without opening the super to check if it is ready for harvest. This is done by simply inserting the Flow Key only an inch or so down the harvesting cavity and harvesting a small amount.
Crystallization is a natural occurrence that can affect all types of honey, regardless of whether it's extracted using Flow or conventional methods.
All honey will eventually crystallize, usually long after harvesting. However, certain floral sources, such as rapeseed (canola), clover, ivy, and goldenrod, are more prone to crystallization within a relatively short timeframe after being capped. These types of flowers produce nectar with higher levels of glucose which is what makes the honey crystallize.
Some beekeepers opt to remove the Flow Super altogether when crystallization-prone plants are in flower. In this case, they often use conventional frames to collect the crystalizing honey, which they feed to their bees as a nutritious alternative to sugar syrup over the winter and into early spring.
Watch Jamie Oliver go into detail about harvesting rapeseed honey early to prevent crystallization in the Flow Super:
If you find yourself with crystallized honey in the Flow Frames, as per conventional hive methods you can place the frames in a warming box (kept at 40°C) where the honey will liquefy again. Alternatively, whilst the frames are still on the hive, you can disrupt the cells and cappings by opening and closing the frame with the Flow Key a couple of times, which will trigger the bees to remove the crystallized honey and repair the comb. Note that the bees need a good quality water source in order to be able to do this.
Which beehive is best?
We hope this has helped clarify any concerns you might have about Flow Hives. As we’ve already mentioned, there are countless approaches to beekeeping and endless opinions on what’s best for bees. As long as beekeepers prioritize the welfare of their bees, these different methods all have their place. If you’ve got more questions about whether a Flow Hive could be right for you, contact our friendly support team today.
]]>
https://www.honeyflow.com/blogs/beekeeping-basics/how-to-move-a-bee-hive2024-02-13T04:25:23+11:002025-10-16T05:47:48+11:00How to move a bee hiveFlow HiveWhen moving a beehive, there are a few things you need to remember, be it a short distance across the garden, or a longer journey to a new location. We'll guide you through both scenarios, and there are a few essentials you need to remember.
“Bees tend to be very geo-located to the spot their hive is in. So if you just pick up the hive and move it, the bees will come back and say - Hey, where’s my hive?’”
- Cedar Anderson, Flow Hive inventor
Preparation
Suit up - Bees can become agitated when their home is moving around, and who can blame them? So it's important that you wear protective gear such as a full bee suit, including gloves and a veil when moving your hive. Even if you've sealed the hive, there's always a chance some bees could find a way out, or there may be stragglers around that won't appreciate your efforts.
Strap up – When moving a beehive, it's important to make sure it all stays together. You can secure the baseboard to the brood box using straps. For long-distance moves, we use a couple of ratchet straps to be safe. For shorter moves, a single strap should be enough.
Shut the door! Or don't – The distance you plan to travel will dictate whether or not you should seal the entrance of your beehive before moving. For moves of less than 30 feet, we recommend leaving the hive open. Anything longer and you should seal up the entrance. The best time to do this is at night, or very early in the morning while all the bees are inside the hive. This way you will avoid losing any bees that are out foraging. If there are some bees around the entrance to the hive, use your smoker to encourage them back inside gently. There's no need to blow smoke into the hive, but a few puffs around the entrance should be enough to send them inside.
When they're in, you can block up the entrance. We like to use steel wool, which can be pushed into the entrance. You can also cover the entrance with mesh, and secure it with tape or staples. Don't forget to close the roof- the Flow Hive 2 comes with a plug, if you've got the Flow Hive Classic you'll need to block the hole in the inner cover, this can be done easily with some mesh.
Keep it cool – Beehives can heat up very quickly, so ventilation is really important! When sealing your hive before moving it, always make sure that air can circulate. Flow Hives come with inbuilt ventilation control, so ensure that this is open. If you've got a screened baseboard, ventilation is taken care of. If not, you'll want to use mesh, which you can staple or tape over the entrance. Also, be careful not to leave the hive in direct sunlight for too long.
No place like home – Bees are oriented to where their hive is located. When moving a beehive, we want to ensure that the bees will get used to their new home, and not return to their original hive location. The distance you want to move your hive will determine the method you should use. If you're going more than 4 miles, then the bees won't recognize the new area and are unlikely to return to the old spot. If you're moving a shorter distance than that, you'll have to take the steps we describe below to ensure the bees can find the hive at the new location.
Don’t have bees yet, but want to get started? A beehive starter kit from Flow Hive contains everything you need to harvest honey straight from the hive.
How to move a bee hive long distances (more than 4 miles)
First of all, make sure you and the hive are secure – suit up, strap up, shut the door, and keep it cool.
Use a pickup truck or a trailer to transport your bees. Transporting a beehive inside a vehicle is dangerous - if the bees get out you could be in real trouble, so we don't recommend this.
Keep your smoker at hand during transportation.
When placing your hive on the pickup or trailer, make sure it sits nice and level. If you've got a Flow Hive 2 or 2+ you may need to adjust the legs to make sure it's well balanced and steady.
Strap the hive on tightly using strong straps. We recommend using ratchet straps as these are really secure.
When you reach the new location, set up your hive, get it level, take off the straps, and open the entrance. The bees will come out and get acquainted with their new home.
How to move a bee hive over a shorter distance (30ft - 4 miles)
Before you start, remember the essential steps – suit up, strap up, shut the door, and keep it cool.
Once the hive is prepared, move it and set it up in the new location. Before opening the hive entrance, put something in front of it. You could hang a towel over the entrance or rest a branch against it. This will help the bees reorient to the new location. As they leave the hive, they will notice that something is different and will be less likely to return to where the hive was originally situated.
Even with this step, it's likely that some bees will return to the original hive location. In this case, you can collect them in a box and bring them to the new place. You may need to do this a few days in a row to get them reoriented. Another option is to do two long-distance moves. Take the bees to a new spot more than 4 miles away, and leave them there for three weeks. Then move them back and place the hive in the new area, by this time they will have forgotten the original hive location, and should reorient to the new place immediately.
Moving a hive 30ft or less
If you want to move the hive less than 30ft, it can be done incrementally, day by day. You can move the hive less than 6ft per day.
Make sure you suit up and secure the hive with straps, but for this method, you can leave the entrance open.
Initially, the bees will return to the original location, but the hive will be close enough that they will find their way back. Any further and they probably won't locate the hive.
The next day, you can move it another 6ft, and carry on until you've got it set up in the new location. Then the bees can settle into their new neighborhood.
Want to learn more about bees & beekeeping? Get started with a free trial to TheBeekeeper.org - the top-rated online education platform for beekeeping.
Need a new beehive, super, brood box or beekeeping equipment? Visit the Flow Hive online store for the best in honey-harvesting technology.
]]>
https://www.honeyflow.com/blogs/beekeeping-basics/choosing-where-to-get-your-bees2024-02-13T04:25:04+11:002025-10-16T05:49:53+11:00Choosing where to get your beesHilary KearneyNow that you’ve got your Flow Hive built and ready for bees, you might be wondering how best to populate it. Acquiring your first bee colony is exciting, but it can also be overwhelming. So, what factors should you consider before choosing where and how to get your first colony?
Many new beekeepers buy their first colony from a beekeeping business, but you may also be able to get bees from another hobbyist beekeeper. A good place to start your research for where to buy bees is your local bee group.
Ask around and find out where other beekeepers get their bees. Is there a reputable company nearby that sells starter colonies? Or maybe somebody in the group is planning to sell some bees. Be sure to start your research early, you may need to reserve your bees several months before spring even begins.
Before you get bees, make sure you’ve got everything you need with a starter beehive kit from Flow Hive. Featuring a beautiful beehive, safety gear and Flow’s patented honey harvesting technology. There’s no better home to welcome your new bees into.
Apiaries that sell bees often offer two different options. You can either buy a package of bees or you can buy a nucleus colony (‘nuc’ for short).
A package of bees has no comb. It’s a cluster of worker bees with a caged queen bee... it’s essentially a man-made swarm. Once you install your package of bees into your Flow Hive, they will begin to build comb and establish themselves in their new hive.
In contrast, a nuc is an already established colony with three to four frames of drawn comb already filled with brood, honey and pollen. The frames of a nuc are easily moved into a Flow Hive where the colony will continue to grow.
Most beekeepers prefer to buy nucleus colonies because they are 2-3 weeks ahead of a package colony in terms of progress, but both are viable options.
Watch this video on how to install a nuc from our Beginner Beekeeping series.
Local bees
One of the most important factors to consider when buying bees is where they come from. The survival rate of your colony is closely linked to climate. If you purchase your bees locally, they will already be adapted to survive in your region. This gives you the best chance at success with your bees. If local bees are not available, try to find a beekeeper from a similar climate.
Honeybee breeds
All honey bees have similar traits, but through breeding, beekeepers have brought out some subtle differences in behavior and categorized them into different breeds or races.
Many beekeepers fixate on the different breeds of bees and will purchase their bees without giving thought to much else. I could go through all the breeds, parsing out their traits and making recommendations, as many articles written before this one have—but in my opinion, too much focus is given to this subject. Even within a certain breed, each colony is truly unique, and the influences of breeding are not significant enough that a new beekeeper would even notice.
There are more important factors to consider when deciding how to populate your Flow Hive that will have a greater bearing on whether you are successful or not with your new bees.
Similar practices
When deciding where to buy bees, many beekeepers forget to consider the practices of the beekeeper selling them.
It’s important to find a beekeeper who keeps bees the way you plan to. This is most relevant to the issue of varroa mites. If you want to attempt treatment-free mite management, you absolutely need to buy your bees from a beekeeper who is successfully doing the same.
If you buy your bees from someone who does regular mite treatments, you should plan on continuing those treatments or your colony will most likely fail. I have seen similar issues with feeding.
If you buy your bees from a beekeeper who heavily feeds, you may find that the bees have grown accustomed to this and will need you to do the same to survive.
When buying bees, talk to the beekeeper selling them and make sure you are on the same page for whatever style of beekeeping you plan to do.
Catching a swarm of bees
“Swarming is the bees’ way of naturally dividing the hive. So it’s an opportune moment to give them a new home.”
- Cedar Anderson, Flow Hive inventor
Although most new beekeepers fill their new hives with bees that they purchased from another beekeeper, there’s another option available for those adventurous enough to try it — catching a swarm!
In most places, swarms are active during the spring and summer season. In many ways, swarms are superior to what you can buy from a beekeeper. Not only are they free, but they are the product of a colony that is thriving in your climate! Not all swarms are created equal though.
The downside of catching a swarm is that you never quite know what you are getting. Some swarms are small and weak, some are without a queen, some have been poisoned already by the time you find them. If you live in an area with Africanized bees, swarms may become overly defensive after they establish themselves. You could also wait all season to catch a swarm and never hear of one to catch.
The safest bet is to start with two hives. Then you can order one colony from an apiary and still hope to catch a swarm for your second without the risk of ending up with no bees at all.
Where to put your beehive
Watch this video from our online beekeeping course for tips on where to situate your Flow Hive.
Want more high-quality videos and beekeeping insight? TheBeekeeper.org features the world’s beekeeping experts, including Hilary Kearney and many more. It’s got everything you need to become a great beekeeper, and comes with a 30-day free trial.
Hilary Kearney is a full-time beekeeper in her hometown of San Diego, California. Her business Girl Next Door Honey educates hundreds of new beekeepers each year. She is the author of the Beekeeping Like A Girl blog and maintains popular Instagram, Facebook and Twitter accounts. When she’s not rescuing bees, teaching about bees, photographing bees or managing one of her 60 colonies, she’s sleeping and dreaming of bees.
]]>
https://www.honeyflow.com/blogs/beekeeping-basics/queenless-hive2024-02-13T04:24:58+11:002025-10-16T05:50:55+11:00How to tell if your hive is queenlessHilary KearneyA queenless hive is a sad story indeed, and one that’s not uncommon for new beekeepers. It can be difficult to diagnose as the effects of queenlessness on your bee colony are—at first—quite subtle. Hilary Kearney has been through it and offers advice on how you can avoid the mistakes she made when she was starting out.
This image shows a small piece of comb with one egg per cell from a queenright hive. This is what your comb should look like.
Queenless hive
My first mistake as a new beekeeper was not recognizing that my colony had lost its queen. To my untrained eyes, everything looked like it was going well. The bees were flying in and out. They were building pristine, white combs. I spent hours watching them from the outside, peeking in through the window at them.
Then one day, it seemed like the traffic in and out of the hive was slower. They had stopped building new comb and the small cluster of bees inside seemed like it was shrinking. Without the queen there to lay eggs, there were no young worker bees to replace the ones dying of old age. I looked at the comb and found only honey and drone larvae.
I had been watching this colony slowly collapse for weeks, but I didn’t know it. There are some telltale signs though, and once you know them, you’ll be able to recognize queenlessness before it becomes too much of an issue.
Sometimes your hive may have a queen, but you still might choose to replace her. See Hillary's blog on requeening a hive for more.
Lack of brood and eggs
The queen bee is the only bee in the hive which can lay fertilized worker bee eggs. So, when the queen is absent, eggs will be the first thing to go missing. For this reason, beekeepers should always check for eggs during inspections to confirm the presence of a queen.
A colony that has been queenless for longer will also lack larvae or capped brood. If you catch a queenless colony early, you can get them queenright before too much damage is done to the population. Remember that every day a colony is without a queen to lay eggs, worker bees are dying of old age and not being replaced.
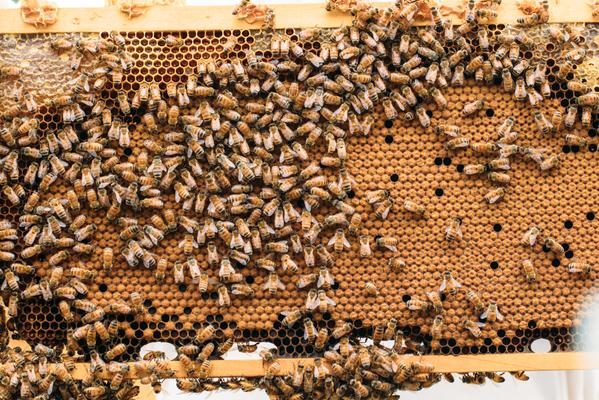
This frame previously had a center patch of brood, which is now being filled with nectar, possibly because of queenlessness.
Watch Hillary explain how to find the queen in this video from our online education platform, TheBeekeeper.org.
An increase in honey and pollen
In a queenless hive, worker bees who were previously occupied with the task of caring for brood will be out of the job. Without a queen there to lay eggs, there will be no more brood for them to care for. This creates a job imbalance in the hive and may result in increased foraging and food stores. If you see plenty of honey and pollen, but no brood, you may have a queenless colony on your hands.
Are you looking to expand your apiary? Flow Hive is the perfect home for bees and allows for effortless honey harvesting. And if you don’t have bees yet, there’s no better way to dive into beekeeping than with a starter beehive kit from Flow.
A queenless colony will usually attempt to make a replacement queen. Just seeing a queen cell or cup does not necessarily mean that your colony is queenless because bees will make queen cells for many different reasons, but when you see a queen cell paired with a lack of brood, that is a strong indication that your hive might be queenless.
When you see a queen cell, check to see what stage it is in. Is there a larva in it? Is it capped? Did it hatch or is it just an empty queen cup? The answers to these questions will give insight into whether or not your colony is hopelessly queenless or just raising a new queen.
This image shows hatched queen cells. A colony that has recently made a new queen may appear queenless because it goes through a period without brood while raising a new queen.
For more info and images of the different types of queen cells, see our blog on swarm prevention.
Temperament and population
Beyond what you will find in the combs, there are other symptoms of queenlessness that may catch your attention. Bees who are queenless are often cranky and listless. They may make a high pitched whine when you open the hive. The population will also start to fall. First you will see less nurse bees, but eventually foragers will decrease in number as well.
Laying workers
When a queen and her brood are absent from the hive for too long, worker bees will begin to lay eggs. Once this starts, it is very difficult to get the colony queenright again. A hive with laying workers typically kills any queen you might try to install. Many beekeepers don’t even bother trying to right a laying worker colony and consider it a loss. Symptoms of a colony with laying workers includes multiple eggs per cell, a lack of worker brood and an increase of drone brood.
Testing for queenlessness
A queenless colony will usually have more than one of the above signs present. If you see just one, you may want to test to see if your colony really is queenless. A simple way to do this is to take a frame of young brood from another colony and put it in the hive. If the bees begin to build queen cells on it, there is a good chance your colony is queenless. You can monitor them closely and let them finish making their own queen or you can destroy the queen cells and purchase a queen to install instead.
Not sure if keeping bees is right for you? Got more questions?
Hilary Kearney is a full-time beekeeper in her home town of San Diego, California. Her business Girl Next Door Honey educates hundreds of new beekeepers each year. She is the author of the Beekeeping Like A Girl blog and maintains popular Instagram, Facebook and Twitter accounts. When she’s not rescuing bees, teaching about bees, photographing bees or managing one of her 60 colonies, she’s sleeping and dreaming of bees.
]]>
https://www.honeyflow.com/blogs/beekeeping-basics/swarm-prevention2024-02-13T04:24:52+11:002025-10-18T00:13:34+11:00Swarm PreventionFlow HiveSwarming is the honeybee colony’s natural means of reproducing itself. Bees usually swarm during spring or summer when lots of food is available. Beekeepers should recognize when their bees in their hives are preparing to swarm, or have already swarmed.
Like almost all fauna and flora, honeybees have an urge to reproduce. If beekeepers don’t notice the signs and respond accordingly, honeybees will multiply naturally through swarming.
Swarming involves the queen and a percentage of the colony leaving the original hive, usually due to outgrowing their current space, to establish a new home elsewhere. It’s a great risk to the colony; doing so is a sign that they are healthy, well populated and have access to good amounts of nectar and pollen. Once colonies feel the urge to multiply, very little will stop them.
As with the majority of beekeeping, swarm mitigation is about understanding bee behavior and attempting to assist them as best you can.
Signs to look out for
There are a number of signs your colony might be preparing to swarm. These are often the reasons that they are swarming in the first place!
Signs that a colony might swarm include:
A very high population of bees in the hive.
The whole width of the entrance is used by forager bees.
All frames within the hive are fully drawn.
Brood frames are full of resources (nectar, pollen, honey, capped and uncapped brood).
High pollen flow in you area, but limited nectar availability.
Bees are storing larger amounts of honey in and above the brood frames, and any other vacant space in the hive. This can lead to a colony becoming honey bound, which reduces the colony's brood rearing space.
High drone population, plus evidence of capped drone cells or larvae. Drones are made in preparation to mate with a new queen. This also shows the colony is resource rich; they can afford to expend time and resources for the care of drones. If a colony begins to decline, drone bees are usually the first to go.
Bees are bearding consistently, regardless of temperature, because there’s not enough room in the hive. Do note that after harvesting you may see a lot of bees out the front making room for other members of the colony to clean and prepare the wax.
Orientation flights can very easily be mistaken for swarming. The main difference is during orientation flights, lots of bees do figures of 8 increasing in size to understand where their home is. Think of it like establishing GPS coordinates.
It can be easy to confuse bees that are doing orientation flights with bees preparing to swarm. This short video shows the difference.
Know your queen cells
Signs that a colony has decided they need to reproduce can be recognized by the presence and maturity of queen cells in the hive.
Dummy cells
Smaller, shorter, incomplete, dummy cells don’t necessarily mean that the colony is going to swarm, unless work is continued on them. They are often made as practice queen cups by worker bees.
Queen Cup
Made with the intention of making a queen. As these grow they begin to resemble an unshelled peanut. If an egg or larva is in the cup, then the colony is preparing to make a queen. It takes approximately 16 days for a queen to emerge, from the day the egg laid.
Queen cup with a larva.
Queen Cell
Also known as a swarm cell, this is a queen cup but the bottom of it is sealed, meaning the larva has been fed and is now in the pupating stage. Bees often make lots of swarm cells (average of 12) which are present throughout the whole hive.
Supersedure cell
Looks similar to a queen cell, it's a colony's natural way of replacing a queen because—in their eyes—she is ‘failing’ (e.g. poor laying pattern, pheromone is weak). Supersedure cells are usually situated around the middle of the brood frame, compared to swarm cells (usually along the bottom of the brood frames). Supersedure cells are usually close together, only a few are made (3 - 4) and are similar in size because the larvae are the same age.
If you find swarm cells in your hive, the colony has decided to swarm and there is little you can do about it, apart from splitting the hive.
Has your colony already swarmed?
If you find a queen cell with a rough opening at the bottom, this is a sign that a queen has already emerged from that cell. Looking at where it’s situated on the frame, the population of the colony and amount of resources can help determine if it was a supersedure or swarm cell.
Some beekeepers mark their queen, so they know if they have been replaced.
A queen has hatched from this cell.
If your colony swarms, it often won’t go far. This can be a great opportunity to start a new colony. See our tips on how to catch a swarm and be prepared with a Flow swarm kit.
Flow Baseboard
Brood Box - Flow Hive Classic
Flow Gabled Roof
Types of swarms
There are three different types of swarms: primary swarms, secondary or after-swarms, and absconding swarms.
Primary swarm
Usually the first swarm of the season. It involves the original queen leaving with about half of the colony and some drones. These are often larger in size.
Secondary swarms
These occur after the primary swarm, meaning they’re usually a lot smaller, sometimes leaving with one or more virgin queens soon after the primary swarm has left. Colonies that frequently swarm are often re-queened, because this tendency can be influenced by genetics. Older queens have a tendency to swarm more frequently, which is why some beekeepers replace their queens every few seasons.
Absconding
This is when the entire colony leaves the hive for a variety of reasons, including wrong climate, starvation due to a lack of resources, but most commonly due to being infested by pests and diseases which have made their space uninhabitable.
Want more info on swarming and all things beekeeping? TheBeekeeper.org is our online education platform - featuring the world’s beekeeping experts and with hundreds of 5-star reviews from our users, it’s an unrivalled resource for beekeepers of all levels.
While honeybees' urge to multiply is natural, letting your bees get to this point is not considered good practice because it poses a risk to the public, your bees, other beekeepers, and honey bee biosecurity in your country.
When a colony swarms you don’t know where they’re going, meaning they could decide to reside in an inconvenient place (e.g. walls, public places), posing a risk to the public.
Letting your bees swarm means that you're losing at least half your colony, and potentially missing honey flows in your area as your bees work to build up the colony again.
Swarms may pose a risk to honey bee biosecurity in your area, because they allow colonies which may be affected by pests and diseases to multiply. Because of this risk, beekeepers often implement hive barrier systems (depending on the number of hives they have), and put swarms they catch in “quarantine” before merging them with their main apiary. Some beekeepers also replace the queen so they’re sure of the genetics of the colony.
A large percentage of swarms don’t make it (particularly secondary and after-swarms because they’re smaller in size).
When a colony swarms, it will settle within 50m of the hive while scout bees search for a new home.
How to prevent swarming
Swarming should not be thought about in terms of prevention but mitigation.
It’s important to identify the signs and implement the necessary practices before it occurs.
Splitting the hive is the most common swarm mitigation practice, however there are a number of methods to delay the time before a colony needs to be split. All of the methods revolve around the creation of space and work opportunities for the bees. Being a super-organism where every member has a role to play it’s important that there’s work available for all bees at every stage of their life.
The most common and easiest practice for delaying a colony split is adding another box to the hive. This creates work and space so the bees don’t feel as congested.
Rotation (replacement with new, empty frames) of a few brood frames so the bees have to draw new comb can also help. The queen prefers laying in fresher foundation, and brood frame rotation every season is important so that the cells, and thus bees, don’t get smaller and smaller over generations.
Harvesting honey is an easy and delicious method to create room in the hive.
If the bees are storing an increasing amount of honey in the brood frames (often during a nectar flow) and it’s becoming honey logged (leaving less brood rearing space) then you can harvest the honey from those frames and put them back in the center of the brood box – the bees will redraw the wax.
If your apiary is free of pests and diseases, but has colonies which are a bit weaker, equalizing resources (nurse bees, capped brood, pollen) between colonies is another method to delay swarming and build up your other colonies. Note that nurse bees transferred into another hive, will be accepted and won’t fly back home like forager bees because they haven’t been outside the hive and established a fixed idea of where “home” is.
Note that feeding bees honey—and thus moving frames of honey from one hive to another—that hasn’t been irradiated can be against the law due to the risk of spreading of pests and diseases. Please ensure that you comply with local regulations.
Is it possible to stop swarming without splitting?
Colonies develop at different rates depending on the climate, foraging opportunities and genetics. While some colonies exhibit swarming tendencies within the first season, others colonies can take years. At some point all healthy colonies will need to multiply.
Splitting a hive is a great opportunity to expand your own apiary or welcome someone else into the wonderful world of beekeeping. If you have a number of hives, you’ll probably already have noticed that beekeeping is a bit addictive in that you say you only want 2 hives, but 2 ends up being 4, which is soon 7… You get it :)
Using a De-maree board to get two colonies out of what looks like one, is a method used by lots of beekeepers in residential areas.
Should you remove swarm cells?
Removing swarm cells won’t eliminate honey bees' urge to multiply, but can be used as a way to delay swarming. If doing this, you have to be very diligent and continue removing the cells, being sure not to miss a single one, because the bees will just keep making them.
Will a queen excluder prevent swarming?
Like removing queen cells, placing a queen excluder at the bottom of the brood box or along the entrance won’t prevent, nor stop, a colony’s urge to swarm, but can similarly give you some time to perform a split soon.
A swarm leaves with the original queen often meaning that she has mated and her abdomen is too big to fit through a queen excluder. Even though bees starve the queen a couple of days before preparing to swarm so that she is lighter and can fly, she often still isn’t small enough to fit through the excluder.
In this circumstance you will see the bees leaving the hive thinking they’re going to swarm, at some point realize the queen is absent and so fly back home.
Eventually, the colony will learn to leave with a virgin queen (or sometimes numerous) because they’re still small enough to get through the excluder. Colonies also respond like this to queens whose beekeeper has clipped their wings.
SUMMARY
Despite often creating confusion, one of the most beautiful parts of beekeeping is that there are always numerous methods and views on just about every topic. The actions you choose to undertake are influenced by your climate and preferred beekeeping practices.
While many elements of beekeeping can be grey, honeybee’s processes, particularly regarding swarming, is very specific. The better an understanding you have of their life-cycle, behavior, signs being exhibited and their meaning, the better equipped you are to engage with and support this super-organism.
If you plan to split your hive to prevent swarming, or want to be prepared to catch a swarm, Flow Hive offers the very best in honey harvesting technology. Perfect for experienced beekeepers and beginners, with friendly and knowledgeable customer support.
Someville, D., 1999. Bee swarms and their control. [online] Dpi.nsw.gov.au. [Accessed 15 July 2021].
]]>
https://www.honeyflow.com/blogs/beekeeping-basics/spring-split2024-02-13T04:24:42+11:002025-10-16T05:53:32+11:00Springtime is splitting time if you want another colonyHilary KearneySpring is the perfect time to get started with a new colony. “Splitting” is a cost-effective way of establishing a new hive and one of the best gifts an experienced beekeeper can give someone new to the hobby. Hilary Kearney explains how to do it and how to avoid some of the pitfalls associated with this common beekeeping practice.
A hive split is a way to make a new honeybee colony from an existing one.
What is a hive split?
If you have a large, healthy hive, it is possible to create a new colony from it by making what is called a split. The basic concept of making a split is that you take a portion of an established colony and transfer it to a separate hive, thereby creating two colonies. The end goal is to have two colonies, each with sufficient worker bee populations, stores and their own queen.
Before splitting your colony, make sure it is healthy and large enough to do so. It’s usually not a good idea to split a first-year colony. Splits should be made from overwintered colonies in the spring when there will be plenty of forage and time for them to recover. Most splits are what you call an “even split”, meaning you will halve the colony, dividing the number of brood combs and honey evenly between the two hives.
This is an example of a good brood frame to move into your new colony. These capped worker bees will soon hatch into nurses.
Why split a beehive?
There are many reasons for making a split. Some beekeepers make splits to increase their apiary or to sell to other beekeepers. Others use splits as a form of swarm control, mite control or to reduce the size of a large colony. The size of the split you make should be determined by your reason for making it. For example, a beekeeper who wants to sell off some colonies will typically make much smaller splits, more accurately called nucs or starter colonies. That way, they don’t weaken their existing colonies too much and they can make a higher number of nucs. A small split should be no smaller than 3 frames of brood comb and ideally it would have 1 additional frame of honey plus extra nurse bees shaken in. If you make your split too small, it will fail.
For a step-by-step video guide on how to split a hive, watch this video from the Flow YouTube channel:
How to split a hive
To start, set up your new equipment and begin to transfer the frames over. The new half of the split will always have fewer bees in it. This puts it at a disadvantage, but two things can be done to bolster it. First, when selecting brood to transfer, make sure you take plenty of capped brood. This brood will hatch soon and help to increase the new colony’s population. Second, make sure to shake in some extra nurse bees. You can do this by locating frames with open brood, they will have the most nurse bees, then hold them over your split and give a sharp shake so that the nurse bees fall into your new hive.
Hilary making a split: moving frames from the original hive to a new box.
Managing drift
When making a split, you have to also consider the problem of drift. Drift refers to foragers who will return to the location of the original hive. If you make a split and leave it in the same yard, you should expect all the workers who can fly to return to the original hive. This can often result in a failed split because the new colony will end up with too few bees. You can address the problem of drift in three ways:
Position both hives next to each other, so that the traffic is divided between the two.
Shake in sufficient nurse bees, who will not be able to fly back to the original hive.
Block the entrance and move the split at least three miles (6km) away.
It’s a good idea to monitor your splits closely in the days following their creation. Make sure each has enough adult bees to care for the brood you have given them and take action if they do not.
For in-depth lessons on splitting a hive, including other methods known as the vertical split and the horizontal split, check out TheBeekeeeper.org. Featuring beekeeping experts from around the world, it’s an unrivaled source of beekeeping wisdom. Try it out with a 30-day free trial.
Buying or raising a new queen
The next to consider is the queen. When making a split, you can either let the bees raise their own queen or introduce a caged queen. Introducing a caged queen will save your new split valuable time. It can take about 3 weeks for a new queen to develop, mate and begin laying eggs. However, letting your bees raise their own queen will save you money and will help to propagate the strong genes of your original colony. Keep in mind that if you are in an Africanized Honey Bee Zone, letting your bees raise their own queen may result in an increase in defensiveness in your colony. If you are making a split for the purpose of mite control, the brood break is what you are after so, you probably want to let your bees raise their own queen or delay installation of a caged queen.
Planning to split your beehive? Flow Hive offers the very best in honey harvesting technology. We also stock high-quality brood boxes, Flow supers, and beekeeping gear.
Hilary Kearney is a full-time beekeeper in her home town of San Diego, California. Her business Girl Next Door Honey educates hundreds of new beekeepers each year. She is the author of the Beekeeping Like A Girl blog and maintains popular Instagram, Facebook and Twitter accounts. When she’s not rescuing bees, teaching about bees, photographing bees or managing one of her 60 colonies, she’s sleeping and dreaming of bees.
]]>
https://www.honeyflow.com/blogs/beekeeping-basics/why-two-hives-are-better-than-one2024-02-13T04:24:35+11:002025-10-16T05:32:19+11:00Why two hives are better than oneFlow Hive
We’re big believers in keeping more than one hive. There’s no need to begin with a lot of hives, but as your beekeeping knowledge and passion grows, your apiary is likely to expand naturally. While it may seem a bit daunting as a new beekeeper, starting out with two hives has a lot of advantages over keeping a single colony.
Boost your learning
Every honeybee colony is different. If you start your beekeeping journey with one hive, you may get a sense that what happens with that first colony is normal or standard behavior for bees. Having a second hive enables you to compare and contrast what is happening in both hives. This rapidly increases the amount you can learn in your first seasons as a beekeeper.
While you can learn significantly more by keeping a second hive, it doesn’t necessarily mean significantly more work beekeeping work. If you’re conducting a brood inspection on a single hive, you’ll need to suit up and get your smoker going. If you’re inspecting one hive, it’s not such a big job to then check another one on the same day.
Identify problems quickly
If you have more than one hive, you’ll get a sense more quickly of when something is wrong with a colony. If you notice that one colony is growing quickly and storing lots of honey while the other has low numbers or is not storing honey, that gives an indication that the weaker colony might have an issue. If on the other hand, neither colony is storing much honey, it’s more likely that local conditions might not be great at the time and there’s not a good nectar flow on.
Don’t miss the honey flow
As with any agricultural activity, beekeeping is subject to peaks and troughs in production, good seasons and bad. One year could yield multiple harvests, while during another you might not get to harvest at all. Equally, one hive could produce a lot more honey during a season than another. If one of your colonies has a disease issue, low numbers or needs to be requeened during a nectar flow, you probably won’t get to harvest any honey from that hive. Having a second hive means that you’ve got a much better chance of still getting a harvest and not missing the season completely.
More resources and more options
One of the major benefits of having more than one hive is that it allows you to share resources between colonies. This is really useful if one colony is struggling. You can swap frames of brood from a strong colony into a weaker colony to help boost the numbers in the struggling hive.
In some cases, you can even merge two weak colonies to make one stronger colony. This could be a good option if you’re worried about smaller colonies surviving the winter, or to take advantage of a heavy nectar flow. We’ve got more details on this topic at TheBeekeeper.org.
Swarm control
Another reason you might want to transfer frames from one hive to another is for swarm management. A lack of space in the hive is a trigger for swarming, so if a colony shows signs that it is preparing to swarm, you can give them more space in the brood box. If you transfer some brood frames to another hive, it can help reduce the likelihood of the colony swarming.
Requeening
If one of your colonies needs to be requeened, it’s really useful to have another colony. You can take a brood frame with eggs from your queenright hive and place it in the queenless brood box. The bees will then raise a queen by feeding royal jelly to the young larvae.
Watch Michael explain his reasons for owning two hives
So there’s a few reasons why it’s a good idea to have more than a single hive in your apiary. You can check out our range of hives here.
]]>
https://www.honeyflow.com/blogs/beekeeping-basics/bearding-what-does-it-mean2024-02-13T04:24:27+11:002024-11-06T00:37:57+11:00Bearding – what does it mean?Flow Hive
Bearding is a term referring to bees accumulating at the front of the hive, in a beard-like shape. Bees do this to make room inside the hive for added ventilation on a hot and humid day. Both the temperature and humidity within the hive are kept to a precise percentage, for both the brood (they require temperatures 32-36C / 90-97F to form properly) and ambient humidity for nectar to be evaporated to honey.
What is the difference between swarming and bearding bees?
Bearding bees can often be confused for a hive preparing to swarm, however, bearding bees look slightly different to a hive about to swarm. Swarming bees are looking for a new home, while bearding bees are trying to keep their hive at optimal temperature.
Bees often beard in the evening, when all the forager bees have returned to the hive, while swarming is more common earlier in the day. There will be a lot more flight activity with bees preparing to swarm than with bearding bees, who will mostly remain on the hive.
What is the difference between swarming and an orientation flight for a bee hive?
It can be easy to confuse bees that are doing orientation flights with bees preparing to swarm. This short video shows the difference.
For more on this topic, see our blog on swarm prevention. If you plan to split your hive to prevent swarming, Flow Hive offers the very best in honey harvesting technology.
Bees bearding
Bees clustering at the front (both entrance/landing board and front panel) of the hive, in an attempt to make space inside the hive.
It’s an exceptionally hot day.
Bees at the entrance facing in the same direction, fanning, trying to cool down the temperature of the hive.
Watch as Cedar answers a question about bearding in this Q&A:
Congestion/lack of space in the brood box. Is your hive overcrowded?
A beard-like formation is accompanied by increased aerial activity in front of the hive (bearding bees crawl out of the hive without becoming airborne).
There are queen cells in your hive.
Bearding is normal bee behavior. If you have concerns and feel unsure about whether your hive is simply bearding or preparing to swarm, we recommend getting in touch with a local beekeeping mentor, or beekeeping club, or ask the friendly Flow community forum.
For more detailed lessons on everything beekeeping, check out TheBeekeeper.org- our online education platform.
Want to get started as a beekeeper?
If you want to get bees of your own, then Flow Hive has you covered. Collect delicious honey from your own backyard without disturbing the bees. Check out our starter beehive kit for a special offer that includes everything you need to get up and running.
]]>
https://www.honeyflow.com/blogs/beekeeping-basics/how-to-overwinter-your-beehive2024-02-13T04:24:10+11:002025-10-16T05:57:01+11:00How to overwinter your beehiveFlow HiveIn most places, there won’t be any flowers available for bees to forage on during winter. So it’s very important to prepare your beehive for the winter. Frederick Dunn is a beekeeper based in the northeastern United States, where winters are long and very cold. He gives some great tips on keeping your colonies safe throughout the colder part of the year. He covers the following topics:
It's a good idea to connect with local beekeepers to understand specific overwintering practices for your area. It is helpful to source bees that are adapted to your region so that their biological reproductive rhythm is suited to the typical climatic conditions in your area.
How well a colony will survive through winter in cold climates depends largely upon:
The number of bees they have in the colony.
The health and condition of the colony.
The resources available for them inside the hive throughout the winter.
How well the hive is equipped to deal with the cold weather (ie: in terms of ventilation, insulation, etc).
What do the bees do during winter?
Towards the end of the summer, the colony will stop producing foraging bees, and instead produce fat winter bees. These live longer than foragers, and their larger bodies help to generate heat and insulate the brood and the queen throughout the winter months.
You need to be sure your hive is queened right coming into fall/autumn. If there are at least 10 bees per minute arriving back to the hive with pollen, it’s usually a good sign that your queen is laying. If in doubt, you may need to inspect the hive. The bees will form a cluster, and start at the bottom of the hive. As the season progresses, they will gradually move upwards, feeding on the honey stores from the bottom up. They will typically advance 1mm per day.
You will need a large cluster of bees in your brood box going into winter, spanning over several frames and about the size of a soccer ball. The cluster needs to be big enough to generate sufficient heat to keep the brood warm throughout winter. The bees will maintain a brood temperature of 94 to 97℉ (34 -36℃ ).
In the depths of winter, the colony’s metabolism slows down and they can go into a state of torpor - a bit like hibernation. Once temperatures increase and they fly out, they will immediately eliminate the waste that they’ve been storing in their bodies.
Winter stores
In cold climates, it’s usually best to use two brood boxes. Either one deep box and one medium, or two deeps. Set up your hive accordingly during spring. Consult with local beekeepers on how much a colony typically requires to get through winter in your area.
You don’t want to have excess space in the hive, as it will require more energy for the bees to keep warm. If you have harvested honey from a super, remove the super and allow the bees to clean off any excess honey. Flow Frames should be drained of honey and wrapped in plastic for storage. You can leave the super in an unheated storage shed for the winter.
After the super has been removed, you should be left with a deep brood box at the base, and a medium or deep super or brood box on top. The bottom brood box should have brood in the center, followed by pollen, with honey stores at the edges. The box on top will only be for honey. A sugar feeder at the top of the hive can help the bees last through winter if they’ve exhausted their honey stores. Ideally, the emergency feed should be installed before winter so that you don’t need to open the top cover when it’s cold. Fred prefers feeding dry sugar in winter, rather than syrup.
Ventilation & insulation
Fred recommends not having any ventilation at the top of the hive (eg: an open-top entrance). This can create a draft, causing the heat generated by the cluster to escape. There should be ventilation at the base of the hive for oxygen to enter and CO2 to be expelled. The bees will also need to be able to leave and enter the hive when the weather is warm enough for them to fly. An entrance reducer or a mouse guard can help to reduce drafts and keep intruders out of the hive.
During winter, it’s not uncommon to see a number of dead bees and the landing board, and sometimes close to the front of the hive. You may need to clear dead bees from the entrance occasionally to make sure it doesn’t get blocked.
You can add insulation to the top cover. Polystyrene or wood shavings can be used for this. You can also wrap the hive with extra insulation. The outside of the hive should be well sealed and waterproof. You may want to strap your hives down in case of high winds. If a beehive gets covered in snow, check the entrance for holes and pathways. The bees will usually maintain pathways out of the hive to allow airflow, while the snow provides extra insulation for the hive.
Don’t open the hive during a cold winter! This risks chilling the brood and killing your colony. You can check the position of the cluster by listening with a stethoscope, tapping gently on the side of the hive to hear the cluster buzz, or by using a thermal camera. The closer the bees are to the top of the hive, the less honey they have left.
Want to learn more? This video is taken from our online beekeeping course - TheBeekeeper.org. Check it out for lessons on all aspects of beekeeping from the world’s experts.
Got more overwintering questions, or tips to share? Our Flow Forum is a great place to connect with other beekeepers and benefit from each other’s experience.
]]>
https://www.honeyflow.com/blogs/beekeeping-basics/how-to-catch-a-swarm2024-02-13T04:24:03+11:002024-02-13T04:24:03+11:00How to Catch a SwarmHilary KearneyCatching a swarm of bees is one of the most joyous parts of beekeeping and it is an easy and free way to bolster your apiary! Read on to find out how you can catch a swarm.
Honey bees swarm in spring when their colony grows large and overcrowded with bees. It is their way of relieving congestion of the colony and it is also how their species creates new bee colonies. When it is time to swarm, the queen and roughly half the bees leave the colony in search of a new place to live. Swarms often take breaks on their journey to their new home and may be found resting in a tree or bush.
Swarms are easy for beekeepers to catch and relocate because, at this stage, they seldom have comb. A true swarm has not settled in its new home and so they will not have started to build. They are just a cluster of bees. Without the complication of comb, a beekeeper can easily scoop, shake or lower the swarm into their equipment and bring them back to their apiary.
The best time to catch a swarm is as soon as you find out about them. A swarm of bees is, by definition, unsettled and will not stay put for long. A swarm may rest in one location for only an hour or they may stay for several days, but the beekeeper has no way of knowing which it will be.
I’ve often rushed out to capture a swarm only to have it leave in the short window of time it took me to get there. During the swarm season, I like to keep everything I need to catch a swarm in my car. That way I can get to them more quickly.
Temperament
Capturing a swarm of bees is magical. No matter how many I catch, I am still filled with childlike glee when they start to swirl around me. One of the things that make the process so enjoyable is that swarms are almost always docile.
Established colonies tend to be defensive. They may sting to protect their home, their brood, and their honey, but a swarm of bees has no home, brood or honey stores. Therefore, they have no reason to sting. It is also said that swarms are less likely to sting because they are full of honey. Each worker carries a small amount of honey inside her honey gut. This honey will help to fuel the work of building a new hive.
It should be noted that on occasion, a swarm will be defensive. Many beekeepers catch swarms without wearing bee suits, but new beekeepers especially should beware of this possibility.
It should also be noted that while most swarms will start out sweet, they will almost certainly become more defensive once they become established. If you are in an Africanized area, this change can be dramatic. Initially, there is no way to tell if you are catching an Africanized swarm or not. It can take several weeks before the bees reveal their true nature.
What you’ll need
The main thing you need for catching a swarm is something to put them in. When selecting a container, make sure you have something big enough to accommodate the size of the swarm you are catching. The size of each swarm can vary from something as small as a baseball to something as big as a couple of basketballs. I find most swarms are about the size of a football. Your container can be anything: a cardboard box, a bucket, a plastic container, a nuc box or you can put them directly into your Flow Hive.
If you do decide to transfer them directly into your Flow Hive, you need only bring the brood box with you. There is no need to bring the Flow super, you can add it later once your swarm has started to build comb and fill the first box. I also like to leave the Flow Hive peaked roof at home when catching a swarm. The hive is easier to manage during transport with just the inner cover. I tape a piece of screen or paper over the hole. If you do use a bucket or cardboard box, just know you will need to transfer the bees a second time into your Flow Hive once you get home. If you can put them directly into their permanent home during the catching process, this will save you and the bees some time and effort!
You’ll need a new home for the bees - this can be a brood box or a smaller nuc box to let them get established. We’ve put together a swarm kit so you can be prepared.
Flow Swarm Kit
Flow Baseboard
Brood Box - Flow Hive Classic
Flow Gabled Roof
Depending on where the swarm has landed you may need a few other things for catching them. If they are up high, you may need a ladder, or to use a long pole. If they are deep in a shrub, you may need some plant clippers. If you haven’t seen the swarm in person, make sure you ask about the position of the swarm so you can arrive prepared.
So, how do you actually get the bees into your container or Flow Hive? There are three simple methods, but the best option can vary depending on the specific situation.
Clip and lower
Generally, the best way to get a swarm in your box is to lower them in. This scenario is usually possible when the bees are hanging from a small branch. You simply clip (cut) the branch and lower it into your brood box. Make sure to leave the frames in and place the swarm on top of them. They will run down and hang from the tops of the frames. If you put the bees in first and then try to put the frames in afterwards, you will have trouble doing it without squishing bees!
Lowering the bees into the box means virtually none of the bees will be separated from the swarm. A few will fly, but most will stay in formation and then regroup in your box. Some believe this method also makes the bees feel like they have chosen to move, which increases the likelihood that they will stay in your Flow Hive.
Shake
If the bees are on a branch that is out of reach or too thick to cut, you can shake them. This method is quick and if your aim is good, it is effective. Just give the branch a single, strong shake and the cluster will fall in a big clump into your box. The downside of this method is that many of the bees will fly and become confused. Some will return to the branch you shook them from, others will land nearby. Basically, bees will go everywhere and it will take more time for them to regroup in your box. However, the majority of them – and probably the queen – will end up in your box.
Scoop
When the bees are on something that prevents them from being lowered or shaken, they can usually be scooped by hand. Some even prefer this over shaking because it’s easier to keep the bees from flying. Once you scoop several handfuls, the bees will start to move of their own accord into the box. If they don’t, just keep scooping.
Did you get the queen?
When the bees start excitedly streaming into the box and fanning at the entrance there’s a good chance that you got the queen or that they have decided to move into the box and the queen will follow. If the bees exhibit this behavior in a location that is not your box, do some investigating because you might find the queen there!
Give them time…
Once you’ve got most of the bees into your box, you’ll need to position it in a way that makes it accessible to the remaining bees. The flying bees will return to the original location of the swarm so you will want to place your box as close to the original location as possible. Then you wait. If possible, wait until dusk to close the box and move the bees away. This will ensure that all of the foragers are back and no bee is left behind. If you must take it in the middle of the day, many bees will be left behind.
Do not disturb
After catching your new swarm, it is important not to disturb them for one week. This is the amount of time it will take them to build comb and start raising brood. If you bother them before that point, they may become annoyed and decide to abscond. Remember, they have nothing invested in your hive at this point. No comb, honey or brood!
In fact, swarms often abscond even when they haven’t been disturbed! Some tricks for getting them to stay include: using a hive that bees have lived in before, tacking a queen excluder over the entrance, giving the bees some empty comb, or best of all giving the bees some open brood comb from another hive.
You may also want to check out our other great video on How to catch a swarm of bees.
If you want to be prepared for swarming season with extra brood boxes, accessories, or a full hive setup, then Flow Hive has you covered. Our revolutionary harvesting system allows you to collect honey from the hive without disturbing the bees.
And if you’re new to beekeeping, check out our starter beehive kit for a special offer that includes everything you need to get up and running. We also offer lots of support and helpful resources for beginner beekeepers.
Hilary Kearney is a full-time beekeeper in her hometown of San Diego, California. Her business Girl Next Door Honey educates hundreds of new beekeepers each year. She is the author of the Beekeeping Like A Girl blog and maintains popular Instagram, Facebook and Twitter accounts. When she’s not rescuing bees, teaching about bees, photographing bees or managing one of her 60 colonies, she’s sleeping and dreaming of bees.
]]>
https://www.honeyflow.com/blogs/beekeeping-basics/swarm-high-in-a-tree2023-10-26T20:04:29+11:002024-11-08T21:10:10+11:00How to catch a swarm high in a treeFlow HiveCatching a swarm is a handy way to grow your apiary. It’s also good beekeeping practice, as swarms can cause a nuisance by setting up in an inconvenient location or displacing native fauna. We’ve got a great blog with detailed instructions on what to do when catching a swarm.
But if the swarm you’ve found is high up in a tree, things get a little more complicated. Accessing the swarm isn’t so easy and mucking about with a ladder could be risky. A handy trick to catch an inaccessible swarm is to use a long pole. Attach a container (maybe a bucket or a box) to your pole and shake the swarm into it.
Want to see how Pete pulls off this high-flying swarm catch? Check out the video!
Flow Swarm Kit
You’ll need a new home for the bees - this can be a brood box or a smaller nuc box to let them get established. We’ve put together a swarm kit so you can be prepared (the pole’s not included 😉).
Flow Baseboard
Brood Box - Flow Hive Classic
Flow Gabled Roof
High swarm catch with a newbee
Watch our latest member of the hive Sophie catch her very first swarm! Cedar talks through why bees swarm, catching the swarm, and building the swarm kit. This one isn't as high, but it still needs a ladder to reach!
Swarm tips
Always wear a beekeeping suit when catching a swarm. Honeybees are usually quite docile when they’re swarming, but it’s best to stay safe.
A good swift shake is the best way to get the swarm into your container.
Drop the swarm straight into their new brood box or nuc box, or else drop them in front of it. If you get the queen in the box, the rest of the bees will follow. Check it out in Pete’s swarm catch below.
If you can, cut the branch the swarm was on, shake any remaining bees off, and discard the branch. This will mean fewer bees returning to where the swarm had been.
If possible, leave the box in place until the evening. This will allow any stray foraging bees to return to the hive before you move it to its new location.
If you don’t want a new colony of your own, give it to another beekeeper who wants to boost their apiary. So bee prepared for this swarming season. Happy beekeeping!
]]>
https://www.honeyflow.com/blogs/beekeeping-basics/attract-native-bees2023-10-20T19:18:41+11:002023-10-20T19:31:10+11:00How to attract native bees to your gardenFlow HiveIf you're keen on welcoming some of the 5,000 species of North American native bees into your garden, we've got some tips on how to do just that.
Most of our native bees are solitary, and many of them make their nests in hollow plant stems. That’s where the Flow Pollinator House comes in. It's tailor-made to mimic the cavities these vital pollinators use in the wild, giving them a cozy spot to call home. With one of these in your garden, you'll provide a safe haven for beautiful native species, including mason bees and leafcutter bees, to raise their young. Some species are also on the lookout for sheltered spaces with plant matter where they can comfortably hibernate over winter.
A triple win for native bees
Some of our native bees have a small range when compared to honeybees, perhaps just a few hundred yards. By creating habitat, we give these pollinators stepping stones through the urban landscape, building insect highways between our wild spaces. If we can give them enough homes, we can bring back some of these important species from the brink of extinction.
But that’s not all. The Flow Pollinator House isn't just a cool home for our native bee buddies. It's also a feel-good purchase because 100% of the profits go to grassroots organizations working to promote pollinator protection. And because we've crafted these bee havens from upcycled Flow Hive offcuts, it reduces our environmental impact. An eco-friendly product that helps our native insects thrive and also funds their protection - it's like a triple win!
More ways to help
But that’s not the only way you can help the bees. There are plenty of ways you can entice native bees and other insects into your garden. Leave some wild spaces, unmowed grass, bare soil patches, and holes in the mud – all perfect for providing native bees with nesting spots. Cut out pesticides and keep a variety of flowering plants around all year long to keep them happily fed. Check out this handy guide on creating a bee-friendly garden for more inspiration!
Great gifts - for people and bees
The pollinator house isn’t just a present for the native bees who’ll be calling it home - it also makes the perfect gift for eco-conscious loved ones. It’s easy to assemble and can make a fun family project. Get creative by painting your designs on the walls. It's also an awesome chance to educate the kids and curious adults in your life about the incredible world of native bees.
We’ve put together the Pollinator Booster Bundle, including the Flow Pollinator House and Flow Garden Tools. It’s a wonderful way to boost your pollination impact and make a saving along the way.
Native bees are essential parts of our ecosystem - so every little bit we can do to give them a helping hand is a step in the right direction. Get your garden buzzing with life and invite some bee buddies around.
]]>
https://www.honeyflow.com/blogs/beekeeping-basics/manage-varroa2023-10-17T03:56:22+11:002024-11-02T01:46:40+11:00How beekeepers around the world manage varroaFlow HiveALSO SEE OUR MAIN INFO PAGE: Monitoring for varroa mites
Beekeepers around the world have been dealing with varroa mites for decades, and today there are a number of ways to effectively mitigate varroa. There’s no universal treatment for the mites that applies to all situations, as the ideal approach will factor in variations in mite numbers, climatic conditions, beekeeping methods, genetic resistance and economic thresholds.
Monitoring
Regular monitoring is essential in understanding when it’s necessary to apply control methods and evaluating the success of a treatment. There will usually be a threshold number of mites per bee at which treatment is recommended, and this may vary from place to place. See our guide to monitoring here.
Seasonality and other factors
There are a number of issues to consider when choosing when to treat against varroa, and what control to implement. In temperate climates, it’s often recommended to treat for mites in spring to help the bees through their busiest period, and again in the autumn after the last honey flow. Varroa numbers should be low coming into winter in order to increase colonies’ survival chances. Treating all the hives in an apiary simultaneously and coordinating treatment with other beekeepers in the area helps to reduce the chances of the mites quickly reinfecting treated hives.
Beekeepers also need to consider factors such as the cost of treatments, how a treatment or combination of them might affect the colony’s health and genetics, residues in hives and honey from chemicals, mites developing resistance to certain treatments, and the regulations that apply in specific regions. Using a mixture of approaches to management is often the best way to minimize the chance of mites developing resistance to any one particular treatment.
IPM - Integrated Pest Management
Integrated Pest Management is an approach that aims to avoid harm, reduce pesticide use and maintain the health of your bees. When using this approach to combat varroa, beekeepers try to reduce mite numbers primarily through cultural and mechanical controls. When chemical treatments are needed, ‘softer’ chemicals derived from natural sources are given preference, with synthetic treatments only applied versus high infestation rates.
Varroa-resistant bees
Certain honeybees have genetic resistance to varroa mites. This can come about as a result of natural selection or selective breeding. Bees with varroa resistance have behaviors that limit mites’ reproduction, including uncapping and recapping brood cells, increased grooming, and mite-biting.
Using bees that have varroa-resistant traits can help to reduce the amount of chemical treatments needed. In South and Central America, miticides have not been widely used, and the honeybees there are believed to have greater genetic resistance to mites when compared with North American bees.
Flow has provided support for Corinne Jordan’s program to breed for varroa resistance in Australian bees using Dr Kaira Wagoner’s innovative UBO technology.
Treatment methods
Cultural controls
Cultural controls are techniques that reduce the mites’ reproduction.
Brood break
A brood break or brood interruption occurs when the queen is not laying eggs and can disrupt the mite’s life cycle by reducing the number of available brood cells for mite reproduction. Putting the queen in a cage for 2-3 weeks provides a brood break. When requeening, a brood break can be done by delaying the introduction of the new queen for a couple of weeks. Beekeepers will sometimes use a brood break as an opportunity to also apply a chemical treatment if necessary, as many of the mites in the hive will not be inside the capped brood cells.
Foundation with small cell comb
If using foundation in your hives, you can choose to provide a smaller-sized cell comb (4.9 mm), as opposed to regular-sized cells (5.2-5.4 mm). Smaller cell comb is said to reduce the mite load as there is less space for them to reproduce, and the post-capping period is shorter, giving mites less time to reproduce.
Mechanical controls
Mechanical controls are methods that involve physically removing mites from the hive.
Trapping mites in drone brood
Mites preferentially reproduce in drone brood. Mite trapping entails adding foundation frames of drone comb to the hive as bait. Mites will preferentially lay in the drone cells which can then be culled when the larvae are 14-23 days old (make sure not to wait longer than 23 days or the mites could all emerge!). The drone larvae and mites are destroyed by scraping the comb into a bin or freezing the frame for a minimum of 3 days.
Screened bottom board
Using a screened bottom ensures that any mites that fall off the bees will fall out of the hive.
Powdered sugar
Some beekeepers sprinkle powdered sugar over their hive on a regular basis, in a method similar to the sugar shake used for monitoring. The sugar coating induces grooming which can dislodge mites and may help to keep mite numbers down.
Chemical controls
While cultural and mechanical controls can be effective in suppressing mite reproduction and keeping their numbers down, there are times when chemical treatments may be necessary. If chemical controls are used, the least toxic options should be used first, with more toxic methods utilized only as a last resort.
NB: Certain chemical treatments are prohibited or restricted in some regions. Make sure to check your local regulations before applying any chemical treatments. Only use as indicated and follow all label directions and safety precautions.
‘Soft’ chemicals
Soft chemicals are derived from natural substances, they are not persistent and they do not contaminate wax or honey over the long term. These include thymol, formic acid, oxalic acid, and hop-beta acids. Soft chemicals have not been shown to negatively affect bee health, and mites have not built up resistance to these products in the same way as they have to some hard chemical treatments.
The effectiveness of these treatments can vary greatly depending on factors such as environmental conditions, time of application, method of application, and frequency of use. Some can be harmful to humans in very high concentrations.
‘Hard’ chemicals
Hard chemicals are synthetic miticides and have been widely used against varroa mites in Europe and North America. They include: Flumethrin (Bayvarol), Tau-fluvalinate, Coumaphos, and Amitraz. These chemicals can be highly effective against mites when used correctly.
Varroa mites can quickly develop resistance to hard chemicals. The compounds can also accumulate in wax and honey, which can negatively impact bee health. Beekeepers often remove their honey supers before using hard chemicals. If applying hard chemical treatments, it’s often recommended to rotate different chemicals to reduce the chances of resistance developing.
]]>
https://www.honeyflow.com/blogs/beekeeping-basics/varroa-mites-what-do-i-do2023-10-17T03:47:10+11:002025-09-26T05:07:58+10:00Varroa mites - what do I need to do?Flow HiveBeekeepers around the world have been dealing with varroa mites for decades. Today there are a number of ways to deal with them - treatments are easy to apply, and with a bit of help your bees will be in the best position to tackle the mites. We’ve compiled this simple guide to help you give your bees the best care possible.
The first line of defence against most honeybee pests and diseases is the health of the colony. A weak colony is at a higher risk of being taken out by varroa - however, even a really strong hive will still succumb if you don’t take steps to help them.
Luckily bees do most of the work, but as a beekeeper, one of the most important things you can do to help is to know your bees well - regular brood inspections are the best way to do this. Make varroa monitoring a part of your inspection routine and keep records to track changes in your colonies over time.
Well-fed bees will do better against varroa than hungry colonies. Note also that varroa can make hives vulnerable to small hive beetles (Aethina tumida). If they're common in your area, you may need to guard against both pests.
There are a few different methods you can use to monitor your colonies for varroa. These can be incorporated into your regular brood inspections.
This article contains useful information on how often you should monitor. In many jurisdictions (including all of Australia), you should notify state bodies if you find mites.
If and when you find mites, don't panic! Varroa management isn't about trying to eliminate them, but rather keeping numbers below a certain threshold.
NOTE: In Australia, where varroa has only recently arrived, in New South Wales and areas close to where varroa has been detected in Queensland and Victoria, it's recommended that you monitor every 3-4 weeks while varroa is in its current 'build up' phase.
This method is a quick and effective way of detecting varroa mites. It involves taking a sample of adult bees from the hive and washing them with alcohol.
This monitoring method uses CO2 - which doesn't kill bees, unlike alcohol washes and sugar shakes.
This method works on a similar basis to the alcohol wash method, but is considered less effective. Although the sugar shake has been widely believed not to kill bees, it's been discovered that this method results in bee mortality several days after application.
Because varroa mites prefer to reproduce on drone brood, uncapping drone cells is a good way to check for varroa.
Putting a sticky mat at the base of a hive can help to detect mites, but should be used in conjunction with other more effective monitoring techniques.
The Flow Super Lifter makes inspections and treatments so much easier.
3. Apply treatments when necessary
There are a number of ways to help keep varroa mite numbers in check. Some of these are preventative techniques, like providing a brood break, uncapping drone brood, or introducing varroa-resistant genes into your colonies. If the mite levels get too high, stronger treatments will usually be needed to help the colony survive. A combination of different tactics is usually advisable, depending on your specific region and your own requirements.
There are a number of issues to consider when choosing when to treat against varroa, and what control to implement. In temperate climates, it’s often recommended to treat for mites in spring to help the bees through their busiest period, and again in the autumn after the last honey flow. Varroa numbers should be low coming into winter in order to increase colonies’ survival chances. Treating all the hives in an apiary simultaneously and coordinating treatment with other beekeepers in the area helps to reduce the chances of the mites quickly reinfecting treated hives.
NSW DPI provides a table for determining the threshold percentage of mites at which treatment is recommended.
Here’s a video from Tocal College NSW explaining how to treat varroa using Formic Pro® strips. This treatment can be applied in seconds if you use the Flow Super Lifter to crack open your hive.
Note that formic acid treatments are temperature-sensitive. Chemical controls should only be used as indicated, all label directions and safety precautions should be followed. Formic Pro strips must be left in the hive for 7 days, after that they can be left in the hive until removed by the beekeeper. Beekeepers using this treatment typically apply it once or twice per season (spring and autumn), with the schedule depending on factors like mite load and climate.
Be sure to do another mite count after completing a treatment so that you can measure how effective it was.
It’s just as important to take the treatments out of the hive at the right time as it is to put them in.
Resources/Links
NB: Flow bears no responsibility for the accuracy, legality or content of external sites or for that of subsequent links. Contact external sites for answers to questions regarding their content.
]]>
https://www.honeyflow.com/blogs/beekeeping-basics/beginner-beekeeping-with-a-flow-hive2023-09-19T20:49:30+10:002025-10-16T05:55:34+11:00Beginner beekeeping with a Flow HiveHilary Kearney
It's not all about the honey
There’s much more to beekeeping than just harvesting honey. Flow Hive beekeeper Hilary Kearney looks at what newbees should do when their Flow Hive arrives.
Once word gets out that you are keeping bees, everyone you know will begin to pester you about honey. This is because of the misconception that a beehive is made entirely of honeycomb.
Outsiders envisage a shining palace of honey from which honey flows effortlessly. Of course, with the advent of the Flow Hive, this particular function is now possible! However, it’s important to understand how much work goes into the production of honey prior to it being in sufficient amounts and ready to harvest.
Before the bees can make honey, they must build comb, raise young and visit a whole lot of flowers! As beekeepers, it’s our job to foster and monitor their progress.
In beekeeping, like with any animal husbandry, there’s a lot of learning to do but here's some of the basics to help you get started.
Composition of a beehive
A beehive is made up of more than honey. The bees build hexagonal beeswax structures called combs and they are used to house both honey and developing bees (brood).
Building new combs requires tremendous energy and is fuelled by pollen and honey consumption.
There’s a lot of variation depending on where the hive is situated, but for many, tapping pounds and pounds of honey right away is not a realistic expectation. In their first year, bees will spend a significant amount of their honey on drawing out combs and these combs will make up their brood nest.
The brood nest
Bees build their brood nest in the bottom box of a Flow Hive or other Langstroth set-up. The brood is critical for the survival and health of your colony. Without constant regeneration, the hive will falter and fail as its population ages.
The brood nest is the very first thing your bees create. Even before the worker bees finish building their first piece of comb, the queen will begin to lay eggs in it. In most places, flowers are only available during a short window of time. The bees must build up their infrastructure and workforce quickly if they wish to capitalise on this fleeting resource. Only after they have established their brood nest will they begin to store honey in large amounts.
It is common for there to be a strip of capped honey at the top of each frame in the brood nest and sometimes a full frame of honey on either end. The honey is stored this way because the bees are using it to insulate their brood nest. Any honey you find in your brood nest should be left alone for this reason.
Equipment
Since bees will need time to establish their brood nest and they cannot begin to store harvestable honey until they do this, you should install your new bees in just a single box.
For Flow Hive beekeepers, this means you should leave your Flow Super in the garage until your bees have filled their brood box. Bees like to stay a warm and cozy 95 degrees Fahrenheit (35 degrees Celsius) inside their cluster. When you give them more space than necessary they have to work much harder to maintain these conditions and the energy they expend doing so may result in less honey stores — not to mention stressed out bees!
After your bees have filled their first box with brood, you have the choice of adding another brood box or adding your Flow Super. Although you may be eager to see your Flow Super in action, adding a second brood box will make for a stronger and more stable colony. The second brood box often contains more honey than brood, but will fluctuate based on your colony’s needs. It gives your bees the flexibility to expand and contract their population as needed and this may result in better honey yields in the long term.
Installing nucs and packages
If you are installing a nucleus ‘nuc’ colony, make sure you transfer the frames in the original order. It doesn’t matter whether you put them in the middle of the box or to one side as long as you do not interrupt the sequence with empty frames. The drawn frames must be next to each other in order for the bees to cluster and maintain their core temperature.
If you are installing a package of bees your colony will not have comb, so you don’t have to worry about how to order it. Just hang your queen cage from the centre frame, shake the bees in, put on the roof and leave them alone for one week. If you disturb a newly installed package before they have had adequate time to start their brood nest, they may abscond from your hive. After one week they will have begun to raise larvae. Even if you do annoy them at this point, they won’t want to abandon their young.
Inspections
When the bees begin to use the super, they will fill the centre frames first and expand outward. So, by the time you see honey through the windows, your super is close to full. How full the frames are with capped cells full of honey is the only information you will need to gather in the honey super. The same cannot be said of the brood nest. There is a myriad of vital information to collect from an inspection of your colony’s brood and it cannot be done by peeking through a window.
There are many different approaches to beekeeping which have bearing on when inspections are performed. I recommend that new beekeepers inspect more frequently (once every 2-4 weeks) because it aids the learning process and prevents cross-comb. Once a colony is established and the beekeeper seasoned, it can be beneficial to inspect less often as frequent disruption causes stress. When inspecting the brood some basics you should look for include:
Eggs to confirm the presence of a laying queen
A healthy brood pattern
Increasing population
Pollen stores
Queen cells.
Learning how to properly inspect your hives will take time and effort. If possible, you should seek guidance through local classes, beekeeping groups or by seeking out a mentor.
Next Steps to Get Started with Flow
Watch our Meet The Beekeeper Series to see the stories of people just like you keeping bees with a Flow Hive.
Join the Flow Community to meet and learn from beekeepers around the world.
About the Author
Hilary Kearney is a full-time beekeeper in her home town of epers each year. Her beekeeping exploits and unique business model have inspired people all around the world. She is the author of the beekeeping blog Beekeeping Like A Girl and maintains a popular Instagram account. When she’s not rescuing bees, teaching about bees, photographing bees or managing one of her sixty colonies, she’s sleeping and dreaming of bees.
The views expressed here are the beekeeper’s own and not necessarily endorsed by Flow. Every hive is different. We recommend consulting with local beekeepers, taking courses and reading widely, including this Flow sponsored pamphlet on beekeeping safety.
]]>
https://www.honeyflow.com/blogs/beekeeping-basics/spring-video-tips2023-09-19T20:47:47+10:002023-09-19T20:47:47+10:00Spring Beekeeping Tips You Need To Know This SeasonFlow Hive
Spring is a busy time for the bees and also for beekeepers!
From inspections and splits to swarm catches – here’s our top 5 tips for managing your colony’s needs this spring.
]]>
https://www.honeyflow.com/blogs/beekeeping-basics/foundationless-brood-frames2023-09-19T20:47:28+10:002023-09-19T20:47:28+10:00Foundationless Brood FramesHilary Kearney
Why foundationless is fabulous
If you are a new beekeeper, you might not have realised how wonderfully subversive it was to receive your Flow Hive brood box without foundation inserts. These pre-fab, plastic or beeswax, comb-stamped sheets are a standard in beekeeping equipment. They are usually accepted and used by new beekeepers without question. Some mistakenly believe that they are a necessity for comb building despite the fact that honey bees have been building their own natural comb without the help of beekeepers for millions of years!
The Benefits of Foundationless Beekeeping
Throwing out your foundation can be met with more controversy than you might expect. You may have already been urged by other beekeepers not to try foundationless frames or been warned that doing so would negatively impact your bees. It’s true that foundationless beekeeping requires more effort on the part of the beekeeper and the bees, but for me, the pros far outweigh the cons. So, what are some of the benefits of natural comb?
It’s what the bees want.
When you give bees the choice, they will always choose empty frames where they can build natural comb, over foundation frames. For me, this is the most compelling reason to ditch foundation and let the bees build their own comb. My beekeeping philosophy is to let the bees decide and trust that bees know best whenever possible.
Cleaner beeswax.
Wax foundation is made from recycled commercial beekeeper’s beeswax. Studies have shown them to be heavily contaminated with agricultural pesticides and miticides. Pesticides bond easily to the oils in beeswax and can build up over time. These chemical contaminants have been shown to disrupt bee development and lifespan as well as an increase incidences of queen failures.
Natural cell size is healthier for bees.
Foundation forces the bees to build abnormally large cells and results in equally larger bees. There is an increasing body of research that suggests this can contribute to health complications for the bees, which might explain why bees naturally build smaller cell sizes and will regress to this smaller size over time. Why fight nature?
In advance stages of cross-comb, the comb must be removed entirely from the frame and tied back in straight. Rubber bands are a simple and easy way to secure the comb in the frame while the bees reattach it. There's no need to remove the rubber bands. The bees will chew threw them and drag them out the front door.This is an example of advanced cross-comb. Although a portion of the comb was built straight, two large combs run perpendicular to the frames. These two pieces of comb were attached to 8 frames in total. I was able to cut along the top of all the frames and remove these combs mostly intact.
Challenges of Foundationless Beekeeping
Less honey?
You might have heard from experienced beekeepers that you shouldn't practice foundationless beekeeping because it will result in less honey. This claim is made for a couple of reasons, but none of them are relevant to the Flow Hive! So, pay them no mind.
Comb breakage?
If you plan to go foundationless, it just takes a little effort and care to handle your frames in such a way that they do not break. The main thing is not to tip your frames during inspections. This will put strain on the combs. Instead, hold them straight up and down.
Cross comb?
The most important part of foundationless beekeeping is getting the bees to build straight combs. Once you remove the foundations, there’s nothing stopping the bees from building in any direction they please. More often than not, they will build across multiple frames if you give them the chance. The result is that you will have a very hard time pulling up frames without destroying comb and angering your bees. You can avoid this (mostly) by installing comb guides!
This is an example of a mild case of cross-comb. The bees simply tried to add a second set of combs to this frame. If it had been left alone, eventually the combs would have grown large enough to span into the neighboring frame, but because it was discovered early it is easy to remove these combs and discard them or tie them into another frame. This often happens because of improper frame spacing. Make sure the frames are pushed tightly together in the center of the box.
Making & Installing Comb Guides
If you’ve purchased the complete Flow Hive, your brood box frames came with comb guides! These guides are wooden strips that run the length or your frame and fit nicely in the groove at the top. I recommend you coat them with beeswax and nail them in place for the best results. These guides are more or less permanent and should help keep your bees building straight for years to come. However, if you wish to add an additional brood box or maybe you’ve purchased only the Flow Super, you need to make your own comb guides.
Materials:
Grooved or slotted frames
14 ” Paint Stirrer Sticks
1” nails
Hammer
Beeswax (remember to source chemical-free wax)
Small paint brush
Beeswax melting container
Step One:
Gather your paint sticks, beeswax, paint brush and melting canister around your stove top. Start by melting your beeswax in something you don’t care much about, like a metal can! Warning: beeswax is flammable so do not leave it unattended and use a double boiler if you want to play it safe.
Step Two:
Use your paintbrush to apply the wax along your paint stick. Coat both sides about halfway up. No need to coat the entire thing since only half of it will be exposed. A single coat should be enough. If your wax cools too much, the wax will become tacky and hard to apply. Just turn the heat back on to return it to a paintable state.
Step Three:
Center and nail your paint sticks (beeswax half down) in the groove or slot at the top of your frame. Your paint stick should hang down about an inch. Note: If your paint sticks are shorter than 14″, you may need to use two. The 14″ sticks work just fine when centered because the gap on either end is small enough that bees are not tempted to cross. I use two nails on each end of the comb guide and give a small tug to make sure it is secure.
Fixing Cross-Combs
The best way to handle cross-combs is to avoid them in the first place with proper guides, but even they are not fail-proof. For this reason, I recommend you peek in on your bees once every two weeks while they are drawing out new comb in the brood box. It is much simpler to fix cross-combs if you catch them before it becomes too extensive.
Fixing mild cross-comb
In most cases, the bees will initially build straight and then flare out and connect to the neighboring frame. In this scenario, I recommend removing any empty or straight frames from the brood box to give yourself room to work on the crossed-comb. Separate the portion of the comb that has gone awry from the neighboring frame by cutting the comb away from the top, bottom and side of the frame. Pull this neighboring frame out of the way, and gently push the flared piece of comb into it’s correct frame. Use a rubber band to secure it in place. Once you have corrected the combs, you may want to reorder your frames to prevent more cross-combs. For example, you may move a frame where the comb has not been completely drawn out between two straight frames that have already been drawn. This boxes in the partially empty frame and will prevent the bees from building it crooked again.
Fixing advanced cross-comb
In extreme cases, you may find yourself with several frames or even an entire box of comb built perpendicular to the frames. Once again, your first step is to remove any empty of straight combs to give yourself room to work. If this cannot be done, you will need to break comb to pull out the first frame. Select one of the outer frames and smoke the area heavily to drive the bees out of harm’s way. Then pull the frame up the best you can. I am afraid there is no way to avoid destruction. You may want a container with a lid to place leaky, damaged combs. You will likely not be able to save them and are better off harvesting or discarding them. Now, you perform a bit of surgery. Try to make the least number of cuts to extract whatever straight pieces of comb that you can. Separate them entirely from the frames and then use rubber bands to secure them within the frames again, this time, going the proper direction. Once again, you may want to rearrange your frames to prevent further incidents of crossing. The trick is not to place two frames with gaps in the same place next to each other.
Hilary Kearney is a full-time beekeeper in her home town of San Diego, California. Her business Girl Next Door Honey provides educational opportunities for hundreds of new beekeepers each year. Her beekeeping exploits and unique business model have inspired people all around the world. She is the author of the beekeeping blog Beekeeping Like A Girl and maintains a popular Instagram account. When she’s not rescuing bees, teaching about bees, photographing bees or managing one of her sixty colonies, she’s sleeping and dreaming of bees.
]]>
https://www.honeyflow.com/blogs/beekeeping-basics/how-to-conduct-brood-inspections2023-09-19T20:46:54+10:002025-10-16T05:39:28+11:00How to Conduct Brood InspectionsFlow Hive
Brood inspections are an incredibly important part of beekeeping – if not the most important part!
]]>
Brood inspections are an incredibly important part of looking after your bees – if not the most important part! Read on for tips on how to inspect your beehive – with information for newbees, or more experienced beekeepers wanting a refresher or different point of view.
In addition to our post below, we have a livestream of Cedar performing a brood inspection with questions and answers from the audience.
How often to conduct a brood inspection?
In spring/summer, it is a good idea to inspect your hive more often – about every 2-3 weeks. We recommend to check in with your local beekeeping club, as the frequency will depend on the local climate and needs of your bees.
As you come to build more of an awareness of your colony, you will be able to also sense whether everything is going okay, whether the hive is bursting at the seams and in need of more room, whether they seem to be a bit weaker, or numbers are declining etc. They will signal when it comes time to do a hive inspection.
When to inspect
Make sure to only conduct inspections on calm, warm days (i.e. not cold, not windy, and not raining) when the outside temperature is above 15°C (59°F).
The ideal time is in the middle of the day when the majority of forager bees are out, and the outside temperature is warmest.
What to prepare
Make sure to wear protective gear, and ensure it is thoroughly zipped up before cracking into your hive with your j-hive tool.
Bring something to take notes - an inspection log book, notebook, or smartphone — beekeeping apps are available. A torch (or flashlight) is useful to help see eggs in cells, and taking photos is great for later reference.
Get a smoker going and ensure there is enough fuel so it doesn’t go out at a crucial time. There is a bit of an art to this – we like to use scrap newspaper and some lightweight lighting material, such as dried leaves and grass, adding a little at a time, whilst puffing the bellows, until there is quite a flame visible. At this stage, add extra material, ensuring to pack it down quite a bit. Keep compressing the bellows of the smoker.
Be careful not to burn yourself.
We like to add slightly damp—or fresh—grass clippings on top to make the smoker a bit cooler.
Once lit, give a few puffs of cool smoke in the hive entrance a couple of minutes before opening to allow it to make its way through the hive, masking the pheromones and calming the bees.
Brood inspection with a Flow Super Lifter
Warning... a full super can be heavy! If you've got a Flow Super Lifter, it will make your brood inspections easier. If there is a super or second brood box on your hive, attach the Super Lifter to gently lift the upper box and keep it in place while you conduct your brood inspection.
Before you go into your hive for a brood inspection, it’s good to have an idea of what you want to be looking for, this will ensure you are working methodically and efficiently.
When inspecting, you may like to consider the commonly used acronym FEDSS—
Food Eggs Disease Space Swarms.
This is what you should be looking for when you are conducting your brood inspection.
Food
You want to make sure the bees have enough capped honey and pollen supplies for the time of year (and the expected nectar flow) – especially for overwinter.
The number of frames of honey that you should leave depends on your climate. Please consult local beekeepers for guidance on how much they leave for their colonies over the winter. Read more about overwintering here.
Pollen
Multi-colour pollen stored in naturally drawn comb
Honey
Capped honey stored, and some uncapped nectar in the bottom center of the frame
Eggs
3 day old larvae and eggs are also a sign of a recently active queen.
When the frame is held up to the light, freshly laid eggs are easily seen. A healthy queen will lay her eggs in the centre of the cell.
A view down a brood cell with eggs
Check for pattern of brood – should be full and healthy looking.
A frame of very healthy looking capped brood pattern
Identify whether worker brood and drone brood is present.
If an excess of drone brood is present (which the photo below does not depict), this could mean your queen is infertile or not present. Worker bees can also lay eggs, which are unfertilised and thus become drone brood in emergency situations when the queen has died.
Capped drone brood and worker brood
Drone bees are generally larger overall than worker bees. They have large eyes and a fat thorax, whereas the worker bees have smaller-proportioned eyes and body.
Uncapped brood, capped worker brood, worker and drone bees
You don’t need to find the queen, however if you do, it’s always a moment of real excitement! She has a long, pointed abdomen – perfect for laying eggs.
You can also assess the presence of your queen by the sight of eggs and approximately 3-day-old larvae.
Pest and disease – check for presence. Have a look at our pest and disease resourcefor what these may look like when present.
For example, sunk cells or pin-prick in the capped brood can indicate AFB or EFB.
Space
Be aware of any cross-combing as you move through the brood box, especially when using foundationless frames. Read more about foundationless frames and cross comb here.
If end brood frames have brood, it means the colony may require more space, as typically they work from the centre outwards. Edge frames should have honey in them, as it is part of their thermal-mass stabilisation.
Depending on your local conditions, this may be the time to add either the Flow Super or a second brood box.
Swarm
Check whether the hive is overcrowded, if there are drones and also queen cells, this could indicate your hive might be getting ready to swarm. Queen cells are peanut-shaped protruding cells, usually at the edges of brood frames.
Queen cells and cups on a brood frames
For step-by-step instructions for inspecting your hive, including a downloadable info sheet and inspection notes, try TheBeekeeper.org. It’s got everything you need to become a great beekeeper, and comes with a 30-day free trial.
When replacing the frames, put them back in the same order you removed them to maintain the layout/structure that the bees have built.
Gently replace the super and queen excluder if the hive is supered. Finally, replace the inner cover/crown board and the roof.
Watch our beginner beekeeping video about brood inspection below:
]]>
https://www.honeyflow.com/blogs/beekeeping-basics/bees2023-09-19T20:43:36+10:002023-09-19T20:43:36+10:00The different roles of the colonyFlow Hive
Learning about bees is one of the most important (and fun!) parts of becoming a beekeeper.
Here’s some incredible facts about the different roles that each colony member plays in the hive, to help you start your beekeeping journey.
The Forager Bee
The Forager is possibly the most recognisable bee in the colony.
Once she’s a mature adult, around 21 days old, her duties shift to tasks outside the hive, mainly collecting pollen, nectar, water and resin. She works in response to the needs of the colony with incredible communication and navigation skills.
She can visit up to 5 thousand flowers in a single day, yet in her lifetime, will only create 1/12 of a teaspoon of honey!
She can fly at an average speed of 24 km per hour, travel up to 10 kms from her hive in search of forage, and is capable of carrying large loads of nectar and pollen equalling her own body weight! How efficient is that 🙂
The Guard Bee
The Guard Bee is tasked with protecting the hive – distinguishing between normal activity and dangerous threats. She quickly calls for assistance with her alarm pheromone if needed.
You’ll find the Guard Bee standing at the hive entrance on her back legs with her front legs raised, inspecting bees who enter. Her colony can be recognised by their odour and will be admitted. She’ll also welcome bees approaching with nectar or pollen – happy to accept free food from a bee entering the wrong hive.
On the lookout for intruders such as robbers from another colony, or predators large and small– she’s joined by a posse of 10-20 guards to help her with this important task.
The Architect
The Architect is responsible for building honeycomb – created from perfect hexagons which, of all possible structures, use the least amount of wax to yield the maximum amount of space and strength. Honeycomb weighing 100g can support up to 4kg of honey!
Around 10 days old, she develops special wax glands under her abdomen, which secrete liquified wax. This hardens into small flakes when exposed to the air. Using her hind legs she passes it to her mandibles and mixes it with saliva to make it malleable for creating comb.
When creating or repairing comb, she’ll link together with other bees, leg to leg, to create a bee scaffold. Her six legs have hooks, which she uses to hold onto another’s – like holding hands – which creates a delicate chain. This is called ‘festooning’.
The Queen Bee
The Queen is the most important member of a bee colony. She is solely responsible for reproduction and is capable of laying 2,000 eggs per day!
Her unique pheromones reassure the colony that she is alive and well.
The Queen’s pheromonal signal also helps to create a social hierarchy. It promotes working together and stimulates activities such as cleaning, building, guarding, foraging, and brood feeding. It also prevents queen rearing and inhibits worker reproduction.
If there are weak signals (ie: if the queen is old, sick or dies), within 12–24 hours the workers are triggered to rear new queens from young fertilised eggs.
The Drone
The Drone is a male bee, whose only real role is to mate with a queen. But not the queen fromhiscolony.
Characterised by a large body and eyes twice the size of a worker bee, The Drone is raised for mating in spring and dies off, or is ejected from the hive, in autumn.
He does not forage, construct comb, or perform any other helpful function within the hive, except on occasion when he might fan his wings to help with cooling – mostly, he’s a drain on resources.
In spring, he will leave the hive during the day to hang out at drone congregation areas, in hopes of discovering a virgin queen on her mating flight. If he's lucky enough to mate, he will not survive…
The Queen’s Attendant
The Queen’s Attendant is part of a special entourage who always accompany her royal highness.
She is vital to the health and survival of the Queen, who is incapable of taking care of her own basic needs. She’s responsible for cleaning, grooming, carrying the Queen’s waste and tending to her every need.
She even helps to predigest the Queen’s food – who doesn't have the correct anatomy to do this for herself. This leaves the Queen plenty of time to spend on the activity that she was created for – laying eggs…
]]>
https://www.honeyflow.com/blogs/beekeeping-basics/how-to-keep-bees-hydrated2023-09-19T20:42:57+10:002023-09-19T20:42:57+10:00How to keep bees hydratedHilary Kearney
In the height of summer, when temperatures are soaring, it's important to remember that bees (and all wildlife) need access to safe drinking water.
Honey bees need water but may drown while trying to collect it. Keep bees from drowning in your pool or pet's water bowl by providing a safe place for them to drink.
What water for insects?
Pond Water
If given a choice, bees will always choose to drink “dirty” water. They appear to favour water that has become murky with algae. So, grant them their wish and set up a bee pond. It doesn’t have to be a big, fancy pond – create a simple water garden with half wine barrels or a similar container.
You just need a barrel, mosquito fish and some floating plants (like water lettuce or water hyacinth). Sometimes these types of ponds do better with a small amount of water circulation, like a small solar fountain. Once a pond is established, it can be very low maintenance.
Clean decaying organic matter from the bottom of the pond so the water is not robbed of its oxygen.
Trickling Fountain
No matter what type of water source you provide, make sure the water current isn’t too strong. Bees like trickling water because there is less of a drowning risk. I often see them hovering or even landing on fountains that have a gentle trickling function. Or fountains that drain into a rock-filled grate.
Bird Bath with Rocks
A simple way to give bees water is just to fill your bird bath with stones. If you already have a bird bath, you can make it attractive to bees by adding these additional landing areas.
You may find that you need two bird baths! One for the bees and one for the birds, because bees can sometimes deter birds from using that same bath.
The downside to bird baths is that they need to be refilled often.
Bucket Systems
Some beekeepers simply use buckets. Add a sponge in a bucket for a simple landing pad or hang a rag halfway in so the bees can take water directly from the rag, or float corks in the water. Any non-toxic floatation device will work!
Make sure you refill your bucket and check it often for mosquito larvae.
Thanks to Beekeeping Like a Girl, Hillary Kearney for permission to republish her blog. Hilary Kearney is a full-time beekeeper in her hometown of San Diego, California. Her business Girl Next Door Honey educates hundreds of new beekeepers each year. She is the author of the Beekeeping Like A Girl blog and maintains popular Instagram, Facebook and Twitter accounts. When she’s not rescuing bees, teaching about bees, photographing bees or managing one of her 60 colonies, she’s sleeping and dreaming of bees.
]]>
https://www.honeyflow.com/blogs/beekeeping-basics/colony-management2023-09-19T20:42:33+10:002023-09-19T20:42:33+10:00Colony management – frequently asked beekeeping questionFlow HiveAlthough harvesting with a Flow Hive drastically reduces the amount of labour in harvesting honey compared to traditional methods – most other aspects of caring for you colony will remain the same.
Here are some frequently asked questions about colony management, answered for you!
What do I do if I have particularly aggressive bees?
Sometimes colonies can be aggressive if they are queenless, at other times particular nectar sources can make bees more prone to defensive behaviour, while sometimes they may react strongly if you’re inspecting them in a bit of a bumpy manner (which may not affect other colonies).
If you are finding that your bees are consistently aggressive, and you’ve ascertained that your hive is not queenless, it is not what flowers they are feeding on, and your bees respond in this manner regardless of your beekeeping style, it may be a case of needing to requeen. Requeening can bring in different behavioural traits—check in with the queen breeder about whether your replacement queen is a gentle one.
What do I do if my hive is weak or struggling?
You need to first of all ascertain why it is that your hive is weak—could it be the time of year? Should your colony be in their expansion phase? (i.e. in spring or summer) If yes, then do a full brood inspection.
Some things to look out for:
Are there pests or disease present?
This may affect the health of your colony—you must treat any pests or diseases as per the legal requirement of your department of primary industry.
Is the queen present?
Can’t find her? Look for a good brood pattern and different stages of eggs, larvae, pupae and brood.
No? Maybe your queen is either not present (and something has happened to her 😞), infertile or not laying. Check out our blog for more info.
Without a healthy, robust fertile queen, your hive will be low in numbers and may be struggling. You may need to requeen.
Food
Is there enough forage available? You may need to supplement their feed.
Location
Have you chosen a sheltered position for the hive which is away from prevailing winds (especially the entrance)? In cool climates it should be in a dry sunny position, and in hot climates the hive will benefit from some shade, particularly in Summer. Ideally, face the entrance in a southerly direction if you’re in the northern hemisphere and northerly direction for the southern hemisphere.
There may be a multitude of other reasons – sometimes a colony's strength can even vary within the same apiary.
If you are unsure, we recommend checking with your local experienced bee mentor or beekeeping club/association.
Can I (indefinitely) reuse brood comb?
You can reuse the same brood comb within the same colony for a few years, however after this timeframe, you may consider replacing the brood frames, as the internal diameter of each cell will become progressively smaller over time – even though the nursery bees will clean out each cell, remnants of the cocoon will still be glued to the cell wall.
Residues of pesticides and disease organisms can also remain inside the wax – it is therefore recommended to cut away very dark old comb (or just replace the entire frame) to make a healthy environment for your baby bees. Make sure to do this before spring when the hive is building it’s numbers and expanding.
Feed colony during drought?
During a dearth of nectar, it may be important to feed your bees with supplementary food. If there is a drought, make sure to check whether your bees have enough stores, and also make sure they have a clean water source.
Do not feed your bees honey (unless it is their own) due to risk of contamination (or it not being real honey!). Most beekeepers choose to feed a sugar solution. Check in with local experienced beekeepers and beekeeping clubs/associations what they recommend.
How to prevent cross-comb
The best way to prevent cross-combing is to avoid them in the first place with comb guides, and importantly by performing routine inspections as the comb is being built out. If you see the comb being built out of place you can easily nudge it back on course when the comb is still fresh.
You can also use wax foundation for the bees to build out from.
Swarming is when the old queen bee leaves the hive with 10-30 000 worker bees in search of a new home. This is a natural evolutionary behaviour for bees – they do this every year in spring.
Some beekeepers consider it poor practice to let your hive swarm; as you effectively lose half the population of your colony—and the swarming bees gorge themselves on honey before leaving in search of a new home—it can leave the colony left behind less strong and robust, taking them more time to rebuild their numbers, which means you mightn’t have the chance to harvest honey in this season (depending on your season).
Swarming can also spread pests and diseases and result in unmanaged feral colonies (if you don’t manage to capture your swarm) – which can further exacerbate pests and diseases.
Check that your bees have enough room in the brood box. You may want to add another brood box, make a split from your hive, or consider rotating the brood frames to create more space by adding empty brood frames into the brood box.
If the timing is right, adding your Flow Super is also a good way to create more space. Check for queen cups and queen cells. Red alert for swarming preparation! You will need to do a split at this stage, if your bees have not already swarmed.
Check for queen cups and queen cells. Red alert for swarming preparation! You will need to do a split at this stage, if your bees have not already swarmed.
Queen cup – acorn-like bulge on the surface of the frame. This can be an indicator the colony is getting ready to swarm.
Queen cells. A sure sign your hive is trying to reproduce a new queen. Either your bees are about to swarm, or they already have.
Sometimes bees may also swarm outside of spring, so it is important to keep an eye on your colony during your regular brood inspections throughout spring and summer.
Should I have more than one brood box? How and when do I add this?
Some beekeepers recommend having more than one brood box in colder climates, or for if you want to expand your colony in warmer climates.
Having more than one brood box (generally two is considered the norm) to take you into winter in cold climates can mean your colony is more likely to survive through the depths of winter. It also means they are more likely to thrive in the next season, and be strong and prolific in gathering and storing nectar.
It can also mean the bees can collect enough food for themselves over winter. It is recommend to go into winter with a least a full super of honey, if you are not going to feed your bees. Read more about overwintering here.
To add an extra brood box to your hive make sure your first brood is almost overflowing with bees – you want at least 90% of the brood frames to be completely built out. Then add the next brood box on top, as you would the Flow Super, keeping the queen excluder above the new brood box when you go to add your Flow Super.
It’s also possible to add a second brood box once the Flow Super is already in place, however, you may see less activity in your super while the bees build out the brood frames below. The bees may even move honey stored in the Flow Frames down to the brood boxes temporarily, however, once the second brood box has been built out in full, the bees should resume activity in the Flow Frames and Super.
How to know when your brood box is ready to have another box added:
You need to open up the brood box—please take safety precautions and use the appropriate safety gear
It is important to install your bees in the brood box and wait until they are fully established before adding the next brood box. This can take anywhere between 1-8 weeks (longer if conditions are not favourable), depending on whether you have a nuc or package of bees, and will vary greatly depending on the time of year and the local resources available for your bees.
We supply foundationless frames with our brood boxes, as we think it’s beneficial for the bees to build their honeycomb from scratch. Many beekeepers also use foundation in their frames as it requires less maintenance when the bees are first establishing themselves in the brood box. When using foundationless frames it’s a good idea to inspect the brood box whilst the colony is building the comb to prevent the bees building cross comb in the frame. This way if they have run off course, you can gently nudge the comb back in place.
Remember to keep all of the brood frames tightly together towards the centre of the box. If there is an extra space this should be distributed evenly on the outer edges of the brood box to further reduce the risks of cross comb. For best results, it is recommended that you check to ensure that all 8 brood frames have been drawn out and contain substantial comb before adding the next brood box. The combination of a full brood box and a significant amount of bees will help to encourage your bees to make fast progress on the next brood box, and subsequently Flow Super.
As always, we strongly recommend checking in with local experienced beekeepers for recommendations. But remember—ask two beekeepers and get three different answers!
]]>
https://www.honeyflow.com/blogs/beekeeping-basics/could-garden-sprays-be-killing-your-bees2023-09-19T20:42:10+10:002023-09-19T20:42:10+10:00Could garden sprays be killing your bees?Hilary Kearney
There is nothing worse than discovering your bees have been poisoned. The entrance, once a busy runway for arriving and departing foragers, now silent with only a few twitching bees in the pile of dead below. The suddenness of a colony lost to pesticide poisoning is shocking. What follows is often heartbreaking, humbling and infuriating. So, how can you tell if your colony has been poisoned, what can you do about it and how do you stop it happening in the first place?
Recognising pesticide poisoning
Since honey bees will fly up to three miles to forage, urban beekeepers find themselves at the mercy of their neighbours when it comes to pesticide usage. Unlike agricultural settings, most urban and suburban homeowners are free to use pesticides without restrictions, licensing or instruction. Improper use of pesticides can devastate nearby beehives. Improper use includes using too much, applying it to plants when they are in bloom, or applying it at the wrong time of day. It’s important to understand that the majority of these incidents happen as a result of ignorance, not malice. Many simply fail to read instructions before using the product they buy and do so without an understanding of the consequences of their actions.
When your colony experiences acute pesticide poisoning, you will see:
A sudden drop in foragers
A large mat of dead bees in front of your hive
Spinning, skipping and disoriented bees on the ground around your hive
Bees dropping from the frames when you lift them out
Dead bees on the bottom board.
The rooftop apiary of a student of mine was recently poisoned and exhibited all of those symptoms. Her two new colonies were thriving and just beginning to fill their second brood box with comb when disaster struck. Nearly all of the foragers were poisoned. Many of them never made it back to the hives, but several hundred did and unfortunately, they passed on the poison to the house bees. When this happens, you will find dead bees inside the hive and young bees will drop off the frames when you lift them out. At this stage of poisoning, a colony’s chance of survival is minimal. However, luckily, in this case after three weeks her queens are still alive and laying well so we are hopeful that they will recover.
How to help a poisoned hive recover
Sadly, most poisoned hives never recover, but in most cases it is a simple numbers game. The bigger your colony is, the better its chance of survival. Once pesticides knock out the field bees, the population will be drastically reduced. A hive with a low population is now at risk for a number of other problems because it will not have the necessary workforce needed to complete daily tasks.
One big one is cleanliness. A poisoned hive can easily become overwhelmed with the housework or cleaning out dead bees and any poisoned larvae. You can’t do much to help this, but if you notice dead bees on the bottom board, be sure to clear them out of the hive to prevent any secondary bacterial infections from taking hold.
Another big problem is food stores. Without foragers, your bees will be forced to live on what they have. If their stores are low, they can end up dying of starvation! Make sure your bees have enough pollen and honey stores and if they do not you should feed them until they can build up their population again.
It is very common for a poisoned colony to end up queenless and it does not always happen right away. You should take special care not to overlook the symptoms of a colony that has lost its queen. If you notice your bees are making new queens, you should let them or replace her yourself. It is likely that your queen has been damaged or killed by the pesticide exposure.
As a rule of thumb, I recommend you reduce the entrance whenever a colony is weakened to protect them from predators. Be sure to do this when your colony is recovering from a poisoning as well as they will be extremely vulnerable.
Lastly, a colony whose population drops suddenly can also fall victim to mites, moths and beetles. Keep a close eye out for these villains in the weeks following the poisoning and take appropriate action against them if you see any signs. It’s a good idea to head off moths and beetles by removing any abandoned comb. A weakened colony may not have the resources to defend all of the combs they once occupied.
Preventing pesticide poisoning
We cannot control where our bees go to forage, but what we can do is educate our communities about protecting our pollinators with responsible pest management practices. Some strategies for reaching your neighbors include: door-to-door canvassing with educational pamphlets, posting on online community forums, contacting local leaders or news organisations, volunteering to speak to garden groups. Here is some useful information to share when employing these outreach strategies.
Pesticides are not always necessary. When a plant is under stress, it’s susceptible to pests and other problems. When you use a pesticide or a fungicide you are really only treating a symptom and not the problem. The problem often lies in the soil. Poor soil health leads to weak plants which leads to pest problems. So, before dousing your plant in pesticides, you might want to investigate whether the soil needs to be amended.
Pick your poison carefully. Some pesticides are more harmful to bees than others and even the ones that are less harmful can still do damage when applied incorrectly. If you feel that you need to use a pesticide, research which ones are most appropriate and least harmful to the bees.
Application matters. Always read the directions on your pesticide product, but in general to protect pollinators, you should not treat plants that are in bloom. It is also important to apply the pesticide in the evening so that it is less likely the bees will encounter it and you should not apply the pesticide in windy or wet conditions because this can lead to drift.
Hilary Kearney is a full-time beekeeper in her home town of San Diego, California. Her business Girl Next Door Honey educates hundreds of new beekeepers each year. She is the author of the Beekeeping Like A Girl blog and maintains popular Instagram, Facebook and Twitter accounts. When she’s not rescuing bees, teaching about bees, photographing bees or managing one of her 60 colonies, she’s sleeping and dreaming of bees.
]]>
https://www.honeyflow.com/blogs/beekeeping-basics/bee-friendly-gardens2023-09-19T20:41:42+10:002023-09-19T20:41:42+10:00Get a BUZZ from a Bee-friendly gardenFlow HiveBeekeeping is a fantastic hobby, but it is a labor of love and not necessarily for everyone. Happily, there are things that everybody can do to help both native bees and European honey bees – such as planting flowering plants, leaving some bare dirt patches around the garden un-mulched, allowing last season’s leftover stalks to lie, and installing pollinator houses.
European honey bees pollinate a third of our food crops, making a huge contribution to our food supply chain, our economy and the broader ecosystem, so the more we can help them do their thing, the better off everyone is. European honey bees will feast on a range of flowering plants, but they do have preferences.
Like humans, bees love herbs. And they’re great to plant as they’re handy in the kitchen and around the house too. And there are many beautiful flowering shrubs and trees you can plant which will have nearby bees waggle-dancing with joy.
Bees are also attracted to many food plants. The great thing about planting some citrus, strawberries or a passionfruit vine is the symbiotic benefit. The bees get their pollen and nectar, and the plants produce bigger, healthier, better formed fruit in greater abundance.
The thyme is right
Bees looooove thyme. It’s a one-stop shop for foragers, providing high yields of both pollen and nectar.
Give it good drainage, and it will prosper in most climates. You can even use it on paths and as a lawn plant. It’s also a delicious culinary herb. Popular throughout the Mediterranean because it makes for super-yummy honey, neighbouring beekeepers will love you if you plant this.
Lovely lavender
Bees love blue and violet flowers best, especially the many species of lavender you can grow at home. Like thyme, it produces an abundance of both pollen and nectar.
A beautiful plant to grow, you can use sprigs to scent your home and nothing’s nicer than being downwind from a lavender bush on a sweet, breezy summer day.
Great sage
Sage costs a fortune at the shops, so planting plenty of it in your yard or on your balcony is fantastic for the home cook. It also happens to produce flowers that are among the honey bee’s very favourites.
They go crazy for it! When they find some they will do a dance so the rest of the colony knows where the party is.
Other plants bees love
Basil
Borage
Chives
Coriander
Comfrey
Fennel
Lemon balm
Mustard
Oregano
Parsley
Rocket
Rosemary
Fruit
Apple
Apricot
Blackberry
Currants
Blueberry
Citrus
Plum
Strawberries
Vegetables
Capsicum
Chilli
Cucumber
Pumpkin
Flowers
Alyssum
Cornflower
Cosmos
Echinacea
Geranium
Roses
Sunflowers
Natives
Banksia
Callistemon
Grevillea
Eucalyptus
Melaleuca
What about native bees?
We have more than 1,500 species of native bees in Australia – ranging from larger bumblebees to smaller native bees.
Some live in colonies, while many work and live a solitary life. There are both ground and twig nesting varieties. Not surprisingly, many native bees prefer native plants!
Invite native bees to move in with a pollinator house
Most of the native bees in Australia are solitary and they come in all shapes and sizes. Essentially, a pollinator house is a structure which accommodates solitary nesting native bees by providing cavities in natural materials for them to live in. You can make your own, from a very basic design (drilling some holes into a block of wood) to as complex and creative as you like.
Materials
Timber
Bamboo
Logs
Recycled cupboards, drawers, crates
Tips for building five-star pollinator accommodation
Use only natural, solid untreated materials (no chipboard or composites)
Go for cavities of various depths, but up to 15cm should be plenty.
Create homes of various widths. Australian native bees range in diameter from 2mm to 1cm
Place in a warm but sheltered spot between three to seven feet off the ground
Ensure the suites in your pollinator house are secure
Use a sloped roof to keep the everything dry
Tips for bee-friendly gardening
Plant flowering plants in bountiful clumps so bees don’t have to search far for forage and can work more efficiently
Avoid pesticides. Companion planting is the way to go if you want to control pests. Pesticides are one of the reasons bee populations are in decline
Plant several species to ensure you have forage for every season
Maintain multiple water sources around your garden
Spread the word among your neighbours, family and friends
]]>
https://www.honeyflow.com/blogs/beekeeping-basics/how-to-swap-out-brood-frames2023-09-19T20:40:52+10:002023-09-19T20:40:52+10:00How to swap out brood framesFlow HiveIt can be a good idea to remove brood frames that have been in the hive for a long time and replace them with fresh frames. This can also reduce the pathogen load in the hive and alleviate the chance of swarming in the spring.
The comb in brood frames gradually becomes darker over time as the wax hardens and the brood cells are reused multiple times. The brood cells shrink in size and can be blocked with propolis. Replace the old frames with new empty ones and the bees will build fresh comb. When doing a brood inspection, look out for dark, hard comb - these are the frames you want to replace.
If there is no brood in the frame you want to swap out, you can immediately remove it from the hive. Check for the queen and shake any bees off the frame and back into the hive. If you’re using foundationless frames, you can simply cut the old comb out with a knife or hive tool and replace the empty frame. If you’re using foundation, you’ll need to have new frames ready to replace the ones you remove.
Don’t remove brood or eggs
If the frame you want to replace contains brood or eggs, you’ll need to wait until they’ve hatched before removing it. Take the frame out of the brood box, shake the nurse bees back in and put the new frame into the super. You can temporarily remove one of the Flow Frames to make room for it. Put a new frame into the brood box and make sure to put the queen excluder on top of the brood box. Another option is to move the old frame from the center to the edge of the brood box. Bees usually store honey in the edge frames.
You can remove the frame once the brood has hatched. This can take up to 3 weeks if there are eggs in the frame. Capped brood will hatch within 1-2 weeks.


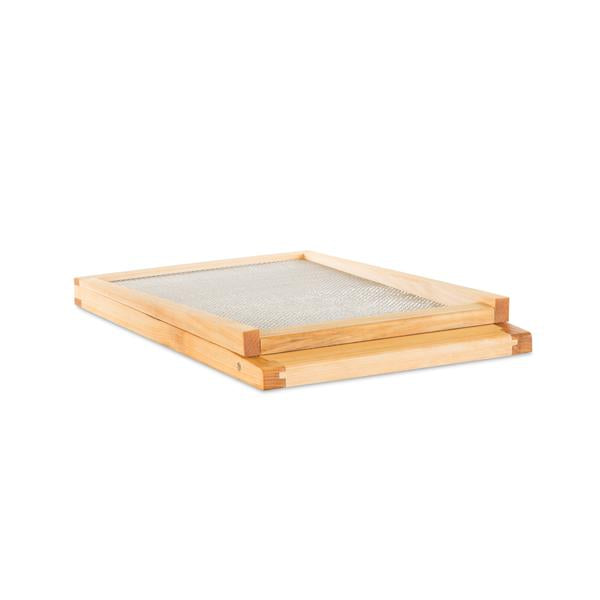

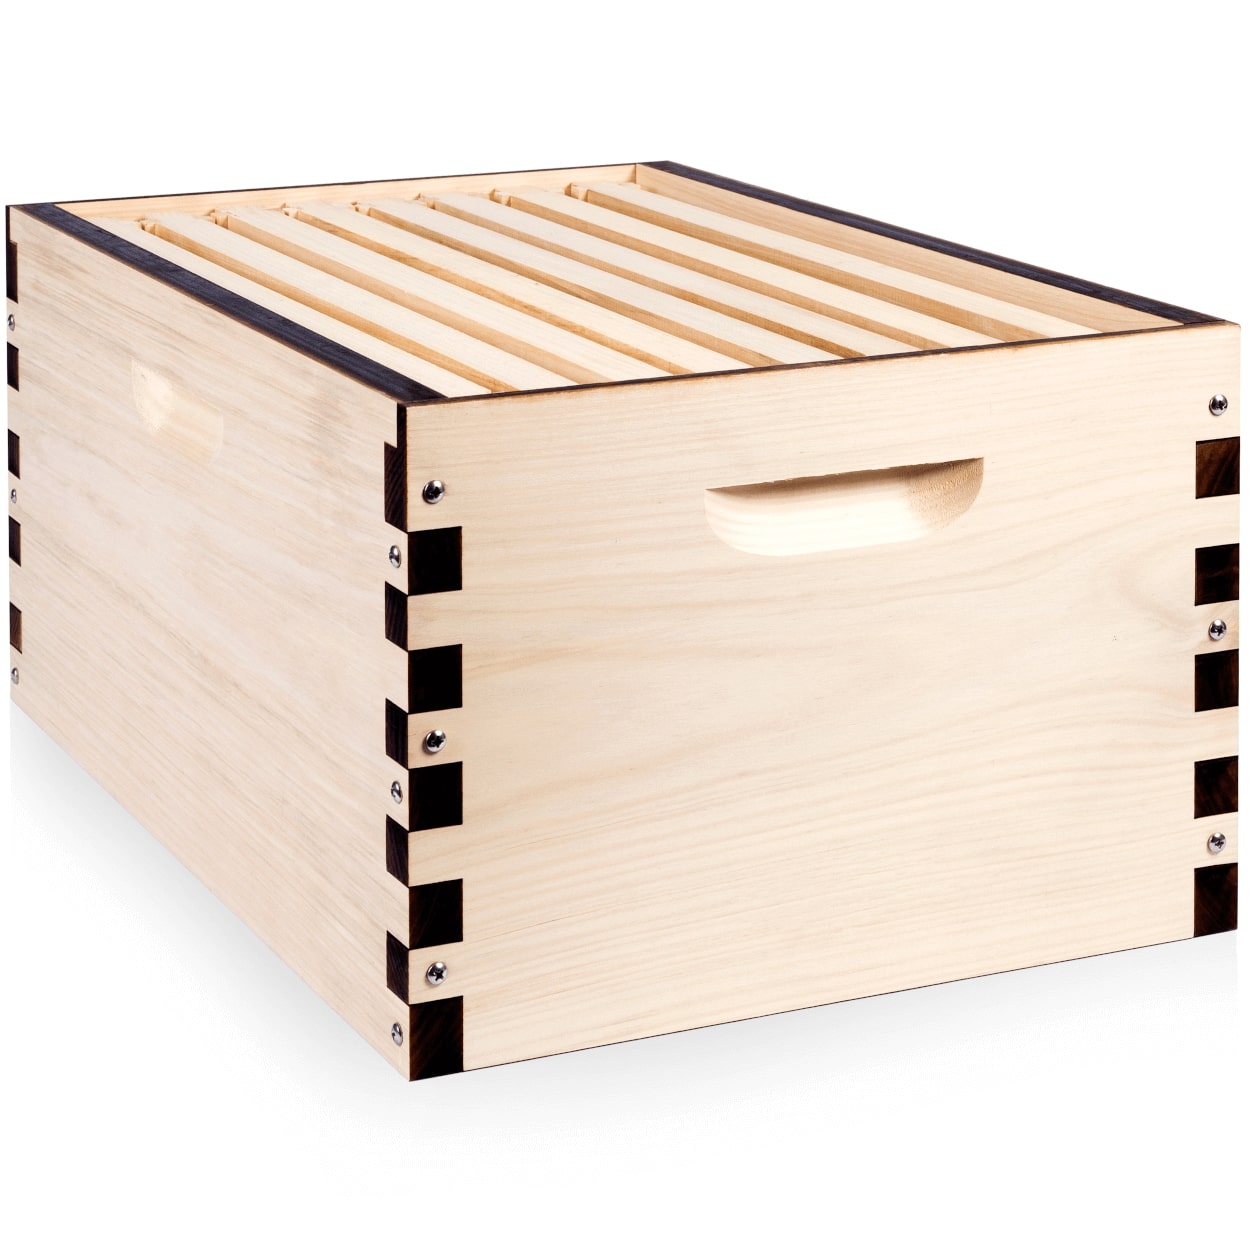
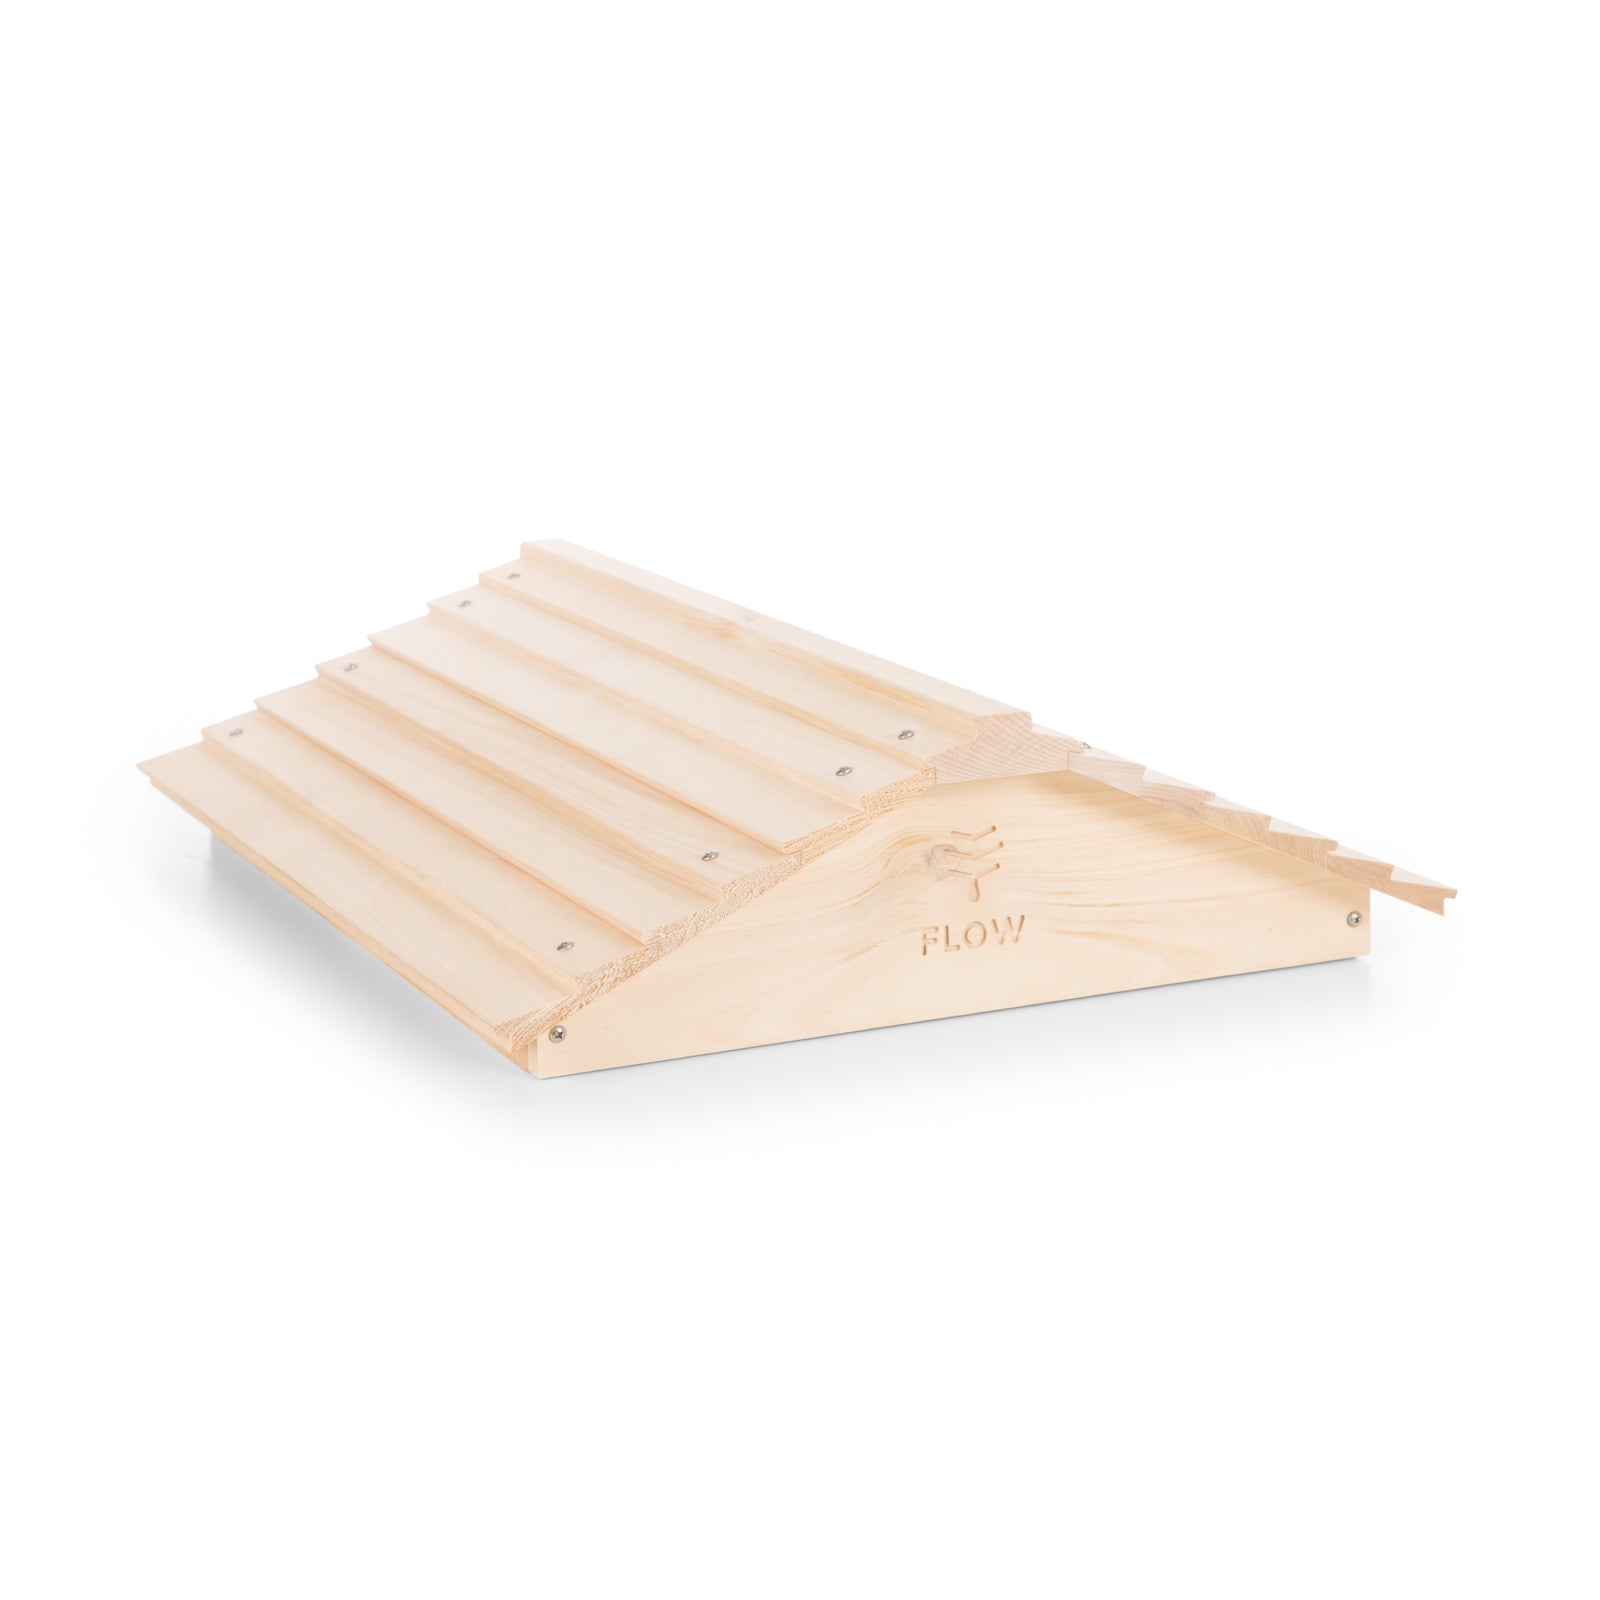


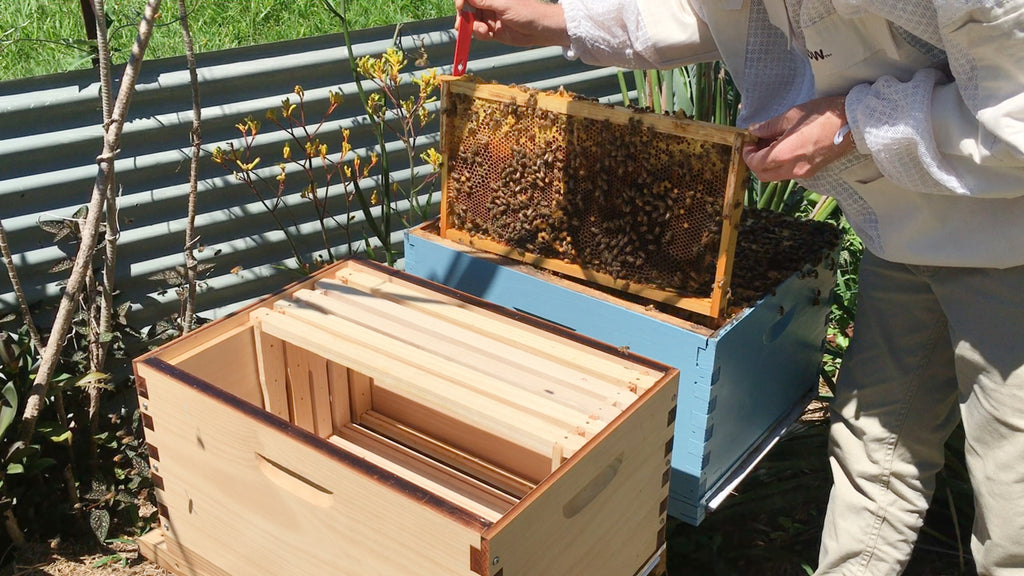


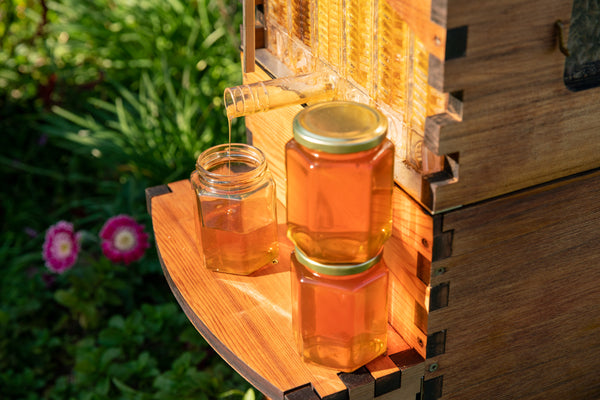


 Hilary Kearney is a full-time beekeeper in her home town of epers each year. Her beekeeping exploits and unique business model have inspired people all around the world. She is the author of the beekeeping blog Beekeeping Like A Girl and maintains a popular Instagram account. When she’s not rescuing bees, teaching about bees, photographing bees or managing one of her sixty colonies, she’s sleeping and dreaming of bees.